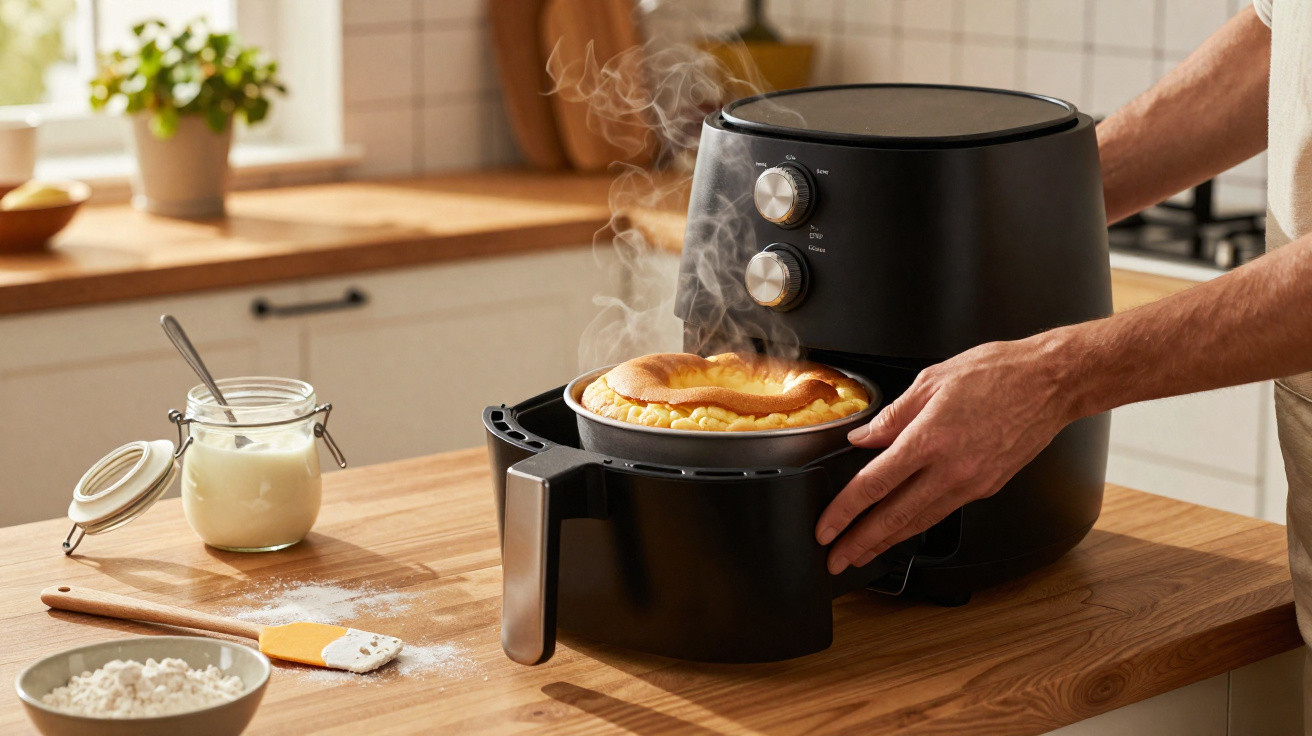
Many people put their first sponge cake into the air fryer and are put off for good afterwards: dark on top, doughy in the middle and a faint burnt smell in the kitchen. Yet a classic yoghurt cake can turn out remarkably light and moist in an air fryer – provided the temperature, baking time and tin are properly matched. That is precisely where the major difference from an oven lies.
Why yoghurt cake in the air fryer so often goes wrong
When switching from a conventional oven to an air fryer, people usually carry over the settings they know: 180 °C and around 30 to 35 minutes. While this works for many traybakes in an oven, it often leads to disaster in an air fryer.
The reason is that the heating elements are positioned very close to the surface, while the fan blows hot air straight onto the batter. The crust browns extremely quickly and can even turn black, although the centre remains uncooked. The surface may seem firm when tested with a skewer, but the cake collapses after being turned out.
Another issue is that many people fill the tin right to the top. The batter rises considerably, reaches the heating element above and burns. At the same time, tins that are too large or unsuitable obstruct the circulation of air. The result is an exterior that is nearly too dark and an interior that is heavy and sticky.
“Anyone baking in an air fryer needs to move away from familiar oven settings. The batter needs less heat, but greater care with the tin and filling level.”
The key setting trick for light yoghurt cake
Experience from numerous test runs reveals a clear pattern: on many common air fryer models, a noticeably lower temperature produces the best result.
A useful guide for a round cake measuring roughly 16 to 18 centimetres across is:
- 160 °C in the air fryer
- around 25 minutes of baking time
- Fill the tin with batter to two thirds only
The reduced temperature stops the surface from drying out or burning too quickly. It gives the batter time to bake evenly and cook through in the middle, without developing a hard layer on top.
A small “paper lid” is also very useful:
- Cover the cake tin with baking parchment for the first 15 minutes.
- Then remove the paper and continue baking uncovered until the 25 minutes are up.
- Finally, check the centre with a thin knife or wooden skewer: if it comes out without any batter on it, the cake is ready.
This combination of initial protection followed by browning creates an even surface without blackened patches.
The right tin: why material and space matter so much
Many people underestimate how sensitive an air fryer is to the tin being used. Unlike a large oven, its cooking chamber is small, so any obstruction to the airflow has an immediate effect.
Choosing and positioning the tin in the appliance
Two options work particularly well for yoghurt cake in the air fryer:
- Flexible silicone tin – adapts well to the space, heats up quickly and rarely sticks.
- Springform tin with a base – sturdy and ideal for neatly shaped slices; it should stand on a rack insert.
It is essential to allow the air to circulate. In practical terms, this means:
- Do not press the tin directly against the inner walls.
- Leave around 1 to 2 centimetres of space on every side.
- Do not cover the base of the cooking basket completely, so air can rise upwards.
“In an air fryer, it is not the baking tray that bakes, but the air. Block its path and you will end up with a dense, greasy centre.”
Basic recipe: classic yoghurt cake for the air fryer
This popular yoghurt cake uses a simple pot-measure method, so there is no need for kitchen scales. An empty yoghurt pot serves as the measuring cup.
For a 16–18 centimetre tin, you will need:
- 1 pot natural yoghurt (125 g)
- 3 pots plain flour
- 2 pots sugar
- 1/2 pot neutral vegetable oil
- 1/2 sachet baking powder
- 2 eggs
- Finely grated zest of one unwaxed lemon or a little vanilla
Method:
- Put the yoghurt into a bowl, rinse out the empty pot and use it as your measuring cup.
- Whisk the eggs and sugar until frothy and paler in colour.
- Add the yoghurt, oil and lemon zest, then briefly mix them in.
- Combine the flour and baking powder, then work them in gradually until you have a smooth batter.
- Lightly grease the tin or, if using a silicone tin, rinse it briefly with cold water.
- Pour in the batter, filling no more than two thirds of the tin’s height.
- Place the tin in the preheated air fryer, set it to 160 °C and cover it with baking parchment.
- Remove the paper after 15 minutes and continue baking until the total baking time reaches around 25 minutes.
- Test whether it is baked, then allow the cake to rest briefly in the tin before carefully turning it out.
Lighter and vegan version with plant-based yoghurt
Anyone avoiding animal products, or simply wanting to make the cake a little lighter, can adapt this recipe without difficulty. Yoghurt provides the basic structure, while eggs can be replaced.
For a vegan version, suitable alternatives include:
- Plain soya yoghurt instead of regular yoghurt
- 100 g unsweetened apple purée instead of 2 eggs
- Vegetable oil such as rapeseed or sunflower oil
The method remains the same. Apple purée makes the batter slightly moister, and the cake often becomes even juicier. Use the same baking-time guidance, although checking briefly 3–4 minutes before the end never hurts.
Adjusting the baking time: translating an oven recipe for the air fryer
Many people already have a favourite oven recipe for yoghurt cake. These instructions can generally be converted approximately as follows:
| Oven instruction | Air fryer recommendation |
|---|---|
| 180 °C conventional heat | around 160 °C |
| 35 minutes’ baking time | 25–28 minutes’ baking time |
| Tin almost full | fill to two thirds only |
A good point to check is after around two thirds of the planned baking time, using a skewer test. This helps prevent the cake from drying out unnecessarily because of the more intense hot air.
Storing and reheating: making the most of yoghurt cake
As the air fryer heats up quickly, it is ideal for refreshing individual slices of yoghurt cake later on. Stored in an airtight container, the cake will keep for two to three days at room temperature, or for up to five days in the fridge.
If you bake larger quantities, you can freeze portions. They remain enjoyable in the freezer for around three months. To reheat, place individual portions directly into the air fryer and warm at 160 °C for approximately three to five minutes. This makes the cake taste almost freshly baked and dries it out less than a toaster would.
Why the air fryer saves energy when baking
Alongside convenience, electricity use also matters. Conventional ovens often have a connected load of around 3000 watts. Many air fryer models are in the 1500 to 2000 watt range, and they also require considerably less preheating time.
The change is especially worthwhile for small cake tins: the interior is compact, heat reaches the batter faster and the energy needed per baking session falls. Anyone who regularly bakes for only one or two people can save a noticeable amount of electricity without giving up homemade cakes.
Typical mistakes – and how to avoid them
The same issues occur for almost every air fryer beginner. This brief overview helps you avoid them from the outset:
- Temperature too high: creates a dark crust and a raw centre – choose 160 °C rather than 180 °C.
- Tin too large: air cannot reach the middle and the cake stays dense – bake a smaller cake instead and, if necessary, plan for two batches.
- Tin overfilled: batter spills over or reaches the top – fill it to a maximum of two thirds.
- No cover: the surface burns quickly – protect it with baking parchment at the start.
Keeping these points in mind turns your air fryer into a surprisingly reliable mini oven without much of a learning curve – perfect for a quick yoghurt cake after work or an impromptu Sunday treat with coffee.








Comments
No comments yet. Be the first to comment!
Leave a Comment