The scent arrives before anything else: a bitter, smoky smell escaping from the kitchen, followed by the quiet of somebody wishing nobody had seen what happened. You raise the lid to find a formerly gleaming pan covered in a black, hardened crust that appears almost fused to it. It is the sort of mess that makes you want to hide the pan at the back of a cupboard and pretend it is not there.
You turn on the hot tap, prod the residue with a sponge and watch the burnt fragments refuse to budge. Somehow, it feels personal.
Then somebody casually suggests, “Why don’t you just use salt and vinegar?” and everything changes.
When a ruined pan turns out not to be ruined
Every shared kitchen seems to have one pan with a story behind it. In a small flat I visited recently, that pan was a stainless-steel saucepan marked by a heavy black ring across its base, resembling a permanent eclipse. Its owner gave a half-embarrassed, half-unrepentant shrug and said, “Pasta night. Got distracted by my phone.”
We have all had that experience: dinner goes from looking promising to becoming charcoal after five inattentive minutes. You scrape and scrub until your shoulders tighten, while silently calculating the cost of replacing the pan.
Then a piece of grandmother-style wisdom appears and changes the entire situation.
A friend came over, took a large box of salt from a high cupboard and a bottle of white vinegar from beneath the sink. There was no branded product, no rubber gloves and no lengthy instructions. Only two ingredients available from any corner shop.
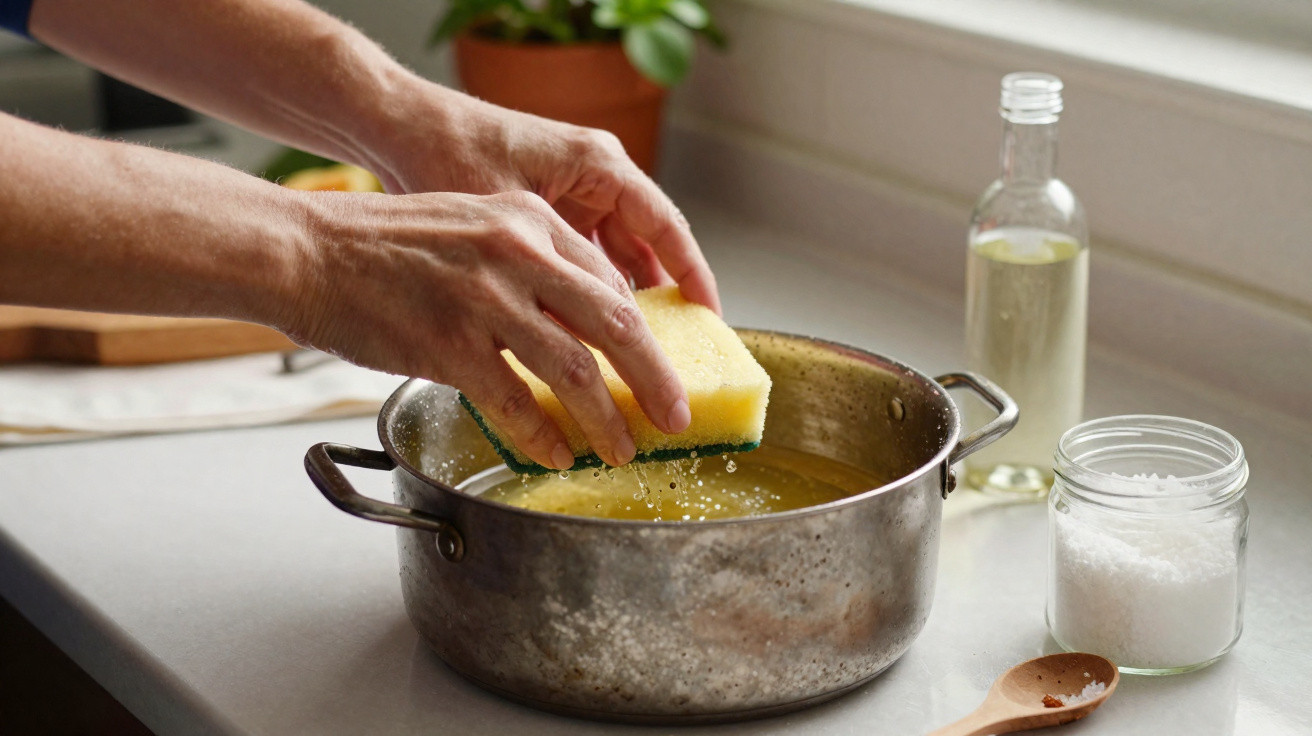
She scattered a thick layer of salt over the cold, burnt pan. This was not a delicate sprinkle, but a proper snowdrift. She then added enough vinegar to dampen it all, releasing its sharp, fresh scent. “Let it sit,” she said, as though the answer could not be more straightforward.
After 20 minutes, the dark coating had begun to soften and peel away at its edges, as if it no longer had the strength to cling on.
What seems miraculous is simply everyday kitchen chemistry. Salt acts as an abrasive, so its small crystals become a mild scrubbing tool beneath your fingertips. Vinegar is acidic, meaning it helps break down the stubborn carbonised food attached to metal.
Used together, they work on the burnt coating in two ways. The vinegar seeps into the crust and weakens its grip, while the salt removes the softened residue without damaging the pan. There is no miracle brand or hidden recipe, only a reaction that quietly does the unpleasant work.
Once you realise how easy it can be, you may wonder why you spent so many years battling scorched pans before giving up on them.
How to save a burnt pan using salt and vinegar
This is the straightforward process that made that supposedly beyond-repair pan usable again. Start by allowing the pan to cool completely. Adding cold liquid to hot metal can cause warping, which you will want to avoid.
Spread a thick, even layer of salt across the burnt surface. Aim for generous snowfall rather than a light dusting. Next, add white vinegar until the salt is thoroughly wet and a shallow layer covers the base.
Leave the mixture undisturbed for 15 to 30 minutes. Afterwards, gently rub in circular motions with a non-scratch sponge. The blackened layer should begin to come away in clumps, rather like mud after rainfall. Rinse the pan, repeat the process once if necessary, and the metal will start to regain its shine.
A few common mistakes can make this easy method unnecessarily frustrating. The first is being impatient: scrubbing after two minutes, then announcing, “This doesn’t work.” Vinegar needs time to work into the burnt residue, particularly when the damage has been there for a while.
The second error is using steel wool or an aggressive scouring pad on the pan. It may be satisfying at first, but it can leave scratches, harm non-stick coatings and reduce the pan's lifespan. The aim is to remove burnt food, not take your frustration out on the cookware.
There is also the urge to add every cleaning product in the cupboard. Mixing random cleaners is not clever, it’s risky, particularly when strong chemicals are involved. Salt and vinegar are sufficient on their own.
“People think they’ve ‘killed’ a pan after one bad burn,” laughs Julie, a cooking teacher who runs low-budget kitchen workshops. “Most of the time, the pan is fine. It’s our patience that’s gone, not the metal.”
- Choose ordinary white vinegar rather than balsamic or apple cider vinegar.
- Let the pan cool fully before putting in the vinegar and salt.
- If the pan has a non-stick coating, test a small area carefully first.
- Repeat the soaking and gentle scrubbing process instead of scrubbing furiously in a single attempt.
- Give the pan a final wash in hot, soapy water to clear any remaining odour.
More than a cleaning trick: a small change in perspective
After seeing a blackened pan gradually recover with only salt, vinegar and five minutes of effort, your outlook shifts slightly. Burnt food no longer seems like a catastrophe, but an issue that can be put right. It becomes a mishap rather than a failure.
There is a particular reassurance in discovering that two everyday ingredients can restore something that seemed beyond saving. You may feel less nervous about cooking over high heat, caramelising onions for a little longer or trying sauces that could catch on the base. Honestly, nobody carries out this routine every day. Still, simply knowing it is possible makes the kitchen feel less like a test and more like a place to play.
Some people exchange festive recipes, while others pass on tips such as this. It is the kind of advice you send late at night to a friend who has just messaged, “I think I destroyed my favorite pan.” Perhaps that is the best part: not only rescuing your own cookware, but restoring someone else's confidence with a teaspoon of salt and a splash of vinegar.
| Key point | Detail | Value for the reader |
|---|---|---|
| Simple ingredients | Requires only household salt and white vinegar | An affordable, accessible answer for any kitchen |
| Gentle method | Abrasive salt + acidic vinegar loosen burnt food | Helps protect pans while lifting stubborn stains |
| Repeatable process | Soak, scrub gently and rinse, potentially twice | Provides a dependable approach for future kitchen accidents |














Comments
No comments yet. Be the first to comment!
Leave a Comment