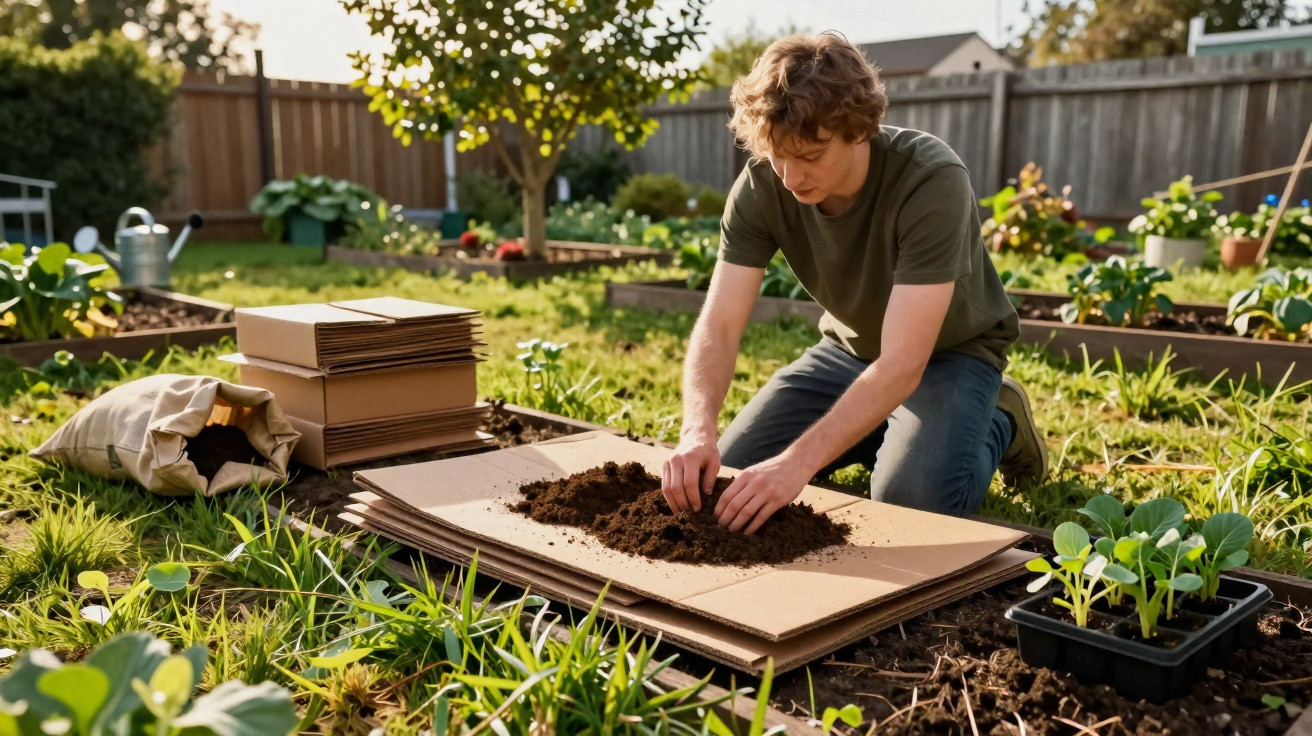
A neighbour rested against the gate and asked whether I was “finally going to dig all that over.” I grinned and hauled a pile of delivery boxes on to the lawn. The pigeons fell silent. In the kitchen, the kettle clicked off and steam curled out like a signal. I cut through the tape and folded back the flaps. The ground seemed almost to exhale. We all know that moment when a quicker approach suddenly appears, yet does not feel like a shortcut. I began arranging cardboard as though I were stitching a patchwork quilt for the earth. Then I emptied a barrowful of compost, watching it scatter over the hidden layer like chocolate cake crumbs. The spade remained spotless. The method is wonderfully quiet.
Building a no-dig bed in one afternoon: why it works and feels so satisfying
No-dig beds mean you no longer have to battle the ground. Put down cardboard, add compost, and allow the life in the soil to do the hard work. Roots can ease into the soft, fertile top layer, while the cardboard suppresses established grass and weeds. There is something unexpectedly peaceful about it. It felt like cheating, in the best way. Even for someone who does not usually garden, the sequence-lay, water, tip, rake-becomes a soothing rhythm. Two hours later, you can step back to see a dark, hopeful rectangle, rather like a newly made bed with cool sheets.
Imagine a compact terrace garden in Leeds where the lawn has never properly flourished. It is Saturday afternoon: kettles boiling, mugs balanced on the wall, and a squeaky wheelbarrow nearby. Boxes left over from moving house are brought out, with tape pulled away and printed sides turned down. Within ten minutes, the lawn has become a jigsaw of overlapping sheets. A neighbour arrives with a bag of council compost, while somebody else contributes last year’s leaf mould. With tipping and raking, they create a 12 cm covering. By teatime, the bed is prepared for spring onions and spinach; by early summer, it produces salads like a deli counter. The spade is still propped up in the shed.
The principle is straightforward. Soil is a living network of pores, fungi and roots, and digging breaks apart that system. Compost placed on the surface feeds it instead. Cardboard excludes light, leaving perennial weeds and grass to starve before softening as worms draw the fibres downwards. The secret is to let the soil life do the digging for you. Water helps the cardboard settle closely against the ground, while a generous compost layer gives seeds an excellent start as the grass beneath lies dormant. Over the following weeks, the entire layered arrangement joins together, becoming crumbly and forgiving underfoot.
The no-dig method: cardboard, compost and a manageable routine
Begin by cutting the grass short or scything any rough growth. There is no need to scalp it; simply reduce it. Collect plain cardboard with very little ink, remove all tape and staples, then flatten the sheets. If the ground is dry, moisten it lightly before laying the cardboard with substantial 10–15 cm overlaps, leaving no gaps large enough for weeds. Drench the sheets until they are flexible and lie snugly against the soil. Next, add 10–15 cm of quality, finished compost and rake it level. Cardboard is not rubbish here; it’s architecture. For a tidy boundary, use bricks, reclaimed timber or woven sticks. You can plant directly into the compost at once, or leave it for a week if you prefer to be cautious.
In truth, no one maintains a process like this every day. Keep the job uncomplicated and take it steadily. Steer clear of glossy or plastic-coated boxes, as the plain brown material is what you need. Do not be stingy with the overlaps, otherwise persistent couch grass can push its way through. When compost is fresh and still slightly hot, choose leafy crops first instead of root vegetables. Water helps the layers settle, but there is no need to make them sodden. Slugs enjoy sheltered, cosy edges, so remove slippery hiding places and inspect beneath boards. On a windy site, hold down the cardboard corners with sticks while you work, preventing a sheet from sailing down the road like an enormous playing card.
Here is the frank encouragement that helps most people carry on:
“If you can move a wheelbarrow, you can build this bed. You’re not building a monument; you’re starting supper.”
- Overlap the cardboard generously and soak it so that it seals against the ground.
- Target 10–15 cm of finished compost; include a light scattering of topsoil only if you have some available.
- Plant into the compost layer, as roots will reach the old soil while the cardboard softens.
- Give the bed an edge to stop compost spreading, using bricks, timber or woven offcuts.
- Cover paths with woodchip to keep footwear dry and the plot looking orderly.
What happens next: the first green growth and its quiet excitement
A few weeks later, you may notice that the surface looks different. The compost has sunk down, its colour has become richer, and the bed appears so smooth you could run a hand over it and come away cleaner. Small, optimistic seedlings are planted, while the joins between cardboard sheets vanish as though the soil had sewn them closed. You will remove a handful of weeds during the first month-windblown seeds always find somewhere to celebrate-but the former lawn remains quiet and soft below. If you can move a wheelbarrow, you can build this bed. The words stay with you, and before long you are considering a second plot, perhaps even a third, like putting down rugs in a room where you want to spend more time.
| Key point | Detail | Benefit for the reader |
|---|---|---|
| Cardboard overlap | 10–15 cm, soaked until pliable | Prevents weeds from slipping through the joins |
| Compost depth | 10–15 cm of finished, dark compost | Provides an immediate planting layer and consistent nutrition |
| Edges and paths | Brick/timber edges, woodchip walkways | Keeps the bed orderly, cuts down mud and deters slugs |















Comments
No comments yet. Be the first to comment!
Leave a Comment