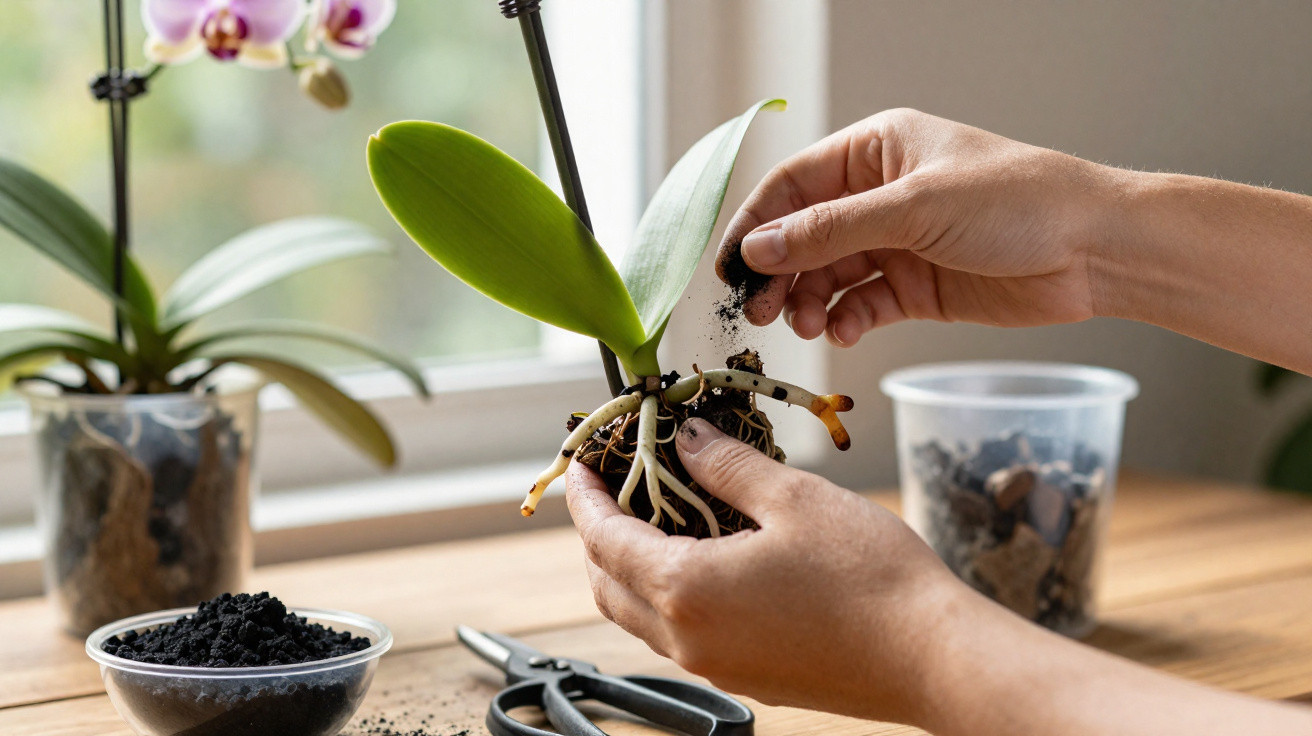
Among the most frequent problems in orchid growing, root rot is one of the most damaging. Once the roots become dark, soft and foul-smelling, the plant can no longer absorb water and nutrients properly. In many cases, however, the issue can be reversed with a simple treatment using powdered activated charcoal: an inexpensive, widely available product that is highly effective at disinfecting damaged tissue.
What is root rot in orchids?
Root rot in orchids is generally caused by overwatering, inadequate airflow or old, compacted growing medium. Healthy roots are firm and usually green or silvery, whereas rotten roots turn dark, soft and hollow, and may disintegrate when touched.
The issue is often accompanied by wilted, yellowing or wrinkled leaves, even when the pot is damp, as well as a strong smell that points to fungal and bacterial activity. Simply watering less is not enough in these situations: diseased parts must be removed and the cuts treated to stop the decay from spreading.
Watch a video from the YouTube channel Diário de uma Orquídea, which explains how to recognise rotten roots and gives step-by-step instructions for saving your plant with a simple ingredient:
https://www.youtube.com/watch?v=J3mCbyE8nco
How does activated charcoal help orchid root recovery?
Activated charcoal acts as an absorbent agent, helping to draw away excess moisture and reduce the presence of micro-organisms in affected areas. Sprinkled over clean root cuts, it creates a thin protective layer that makes further infection more difficult and supports healing.
It is available as powder or tablets, which can be crushed into a fine powder suitable for use on plants. Apply it only to cut points and damaged sections, always alongside corrected watering, proper ventilation and, where needed, a complete replacement of the growing medium.
How to apply activated charcoal step by step
Correct handling is essential for the treatment to work well, and it can be carried out using simple, clean materials. Follow these basic steps to clean the roots and apply the charcoal safely:
- Remove the plant from the pot: Carefully take out the orchid, loosening the growing medium to expose all the roots.
- Clean the roots: Remove remnants of the growing medium by hand or under a gentle flow of water, so the damage can be seen clearly.
- Cut away diseased roots: Use sterilised scissors or a craft knife to remove dark, soft or hollow roots, leaving only firm sections.
- Apply activated charcoal: Dust a light layer of powder over every cut and any area from which rotten tissue has been removed.
- Allow time to dry: Leave the plant in a dry, shaded spot for several hours, allowing the cuts to dry thoroughly.
- Repot in fresh growing medium: Place it in a clean pot with an airy growing medium, without reusing the old material.
During this process, use charcoal sparingly and only where there are wounds or where diseased tissue has been removed. Too much powder can retain moisture, reduce airflow around the roots and delay the rooting of new shoots.
How to care for an orchid after activated charcoal treatment
After treating and repotting the orchid, its recovery period requires a stable setting with good indirect light, air circulation and carefully controlled watering. Signs of improvement include firmer leaves, pseudobulbs that look hydrated, and green or whitish tips emerging from the roots, which indicate new growth.
For the first few weeks, avoid heavy fertilising and check that the growing medium remains free from unpleasant smells or visible mould. If it becomes waterlogged again or breaks down quickly, the orchid may need repotting once more into a more suitable pot. With this combination of care, activated charcoal becomes more than just a cupboard item: it is a useful ally for extending the life of orchids that once seemed beyond saving.
















Comments
No comments yet. Be the first to comment!
Leave a Comment