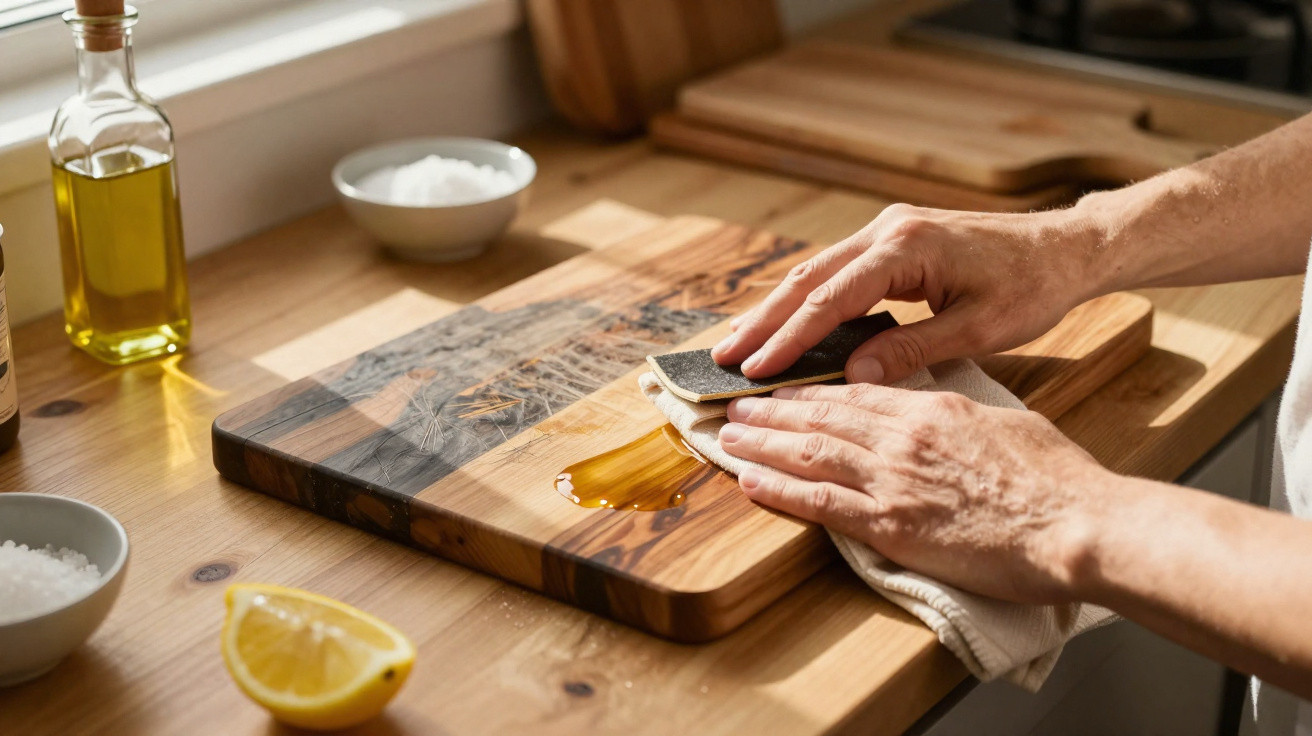
Keep it – with one simple trick, it can look almost factory-new.
In many kitchens, a much-loved wooden chopping board is thrown away far too soon. Deep knife marks, greyed wood and stains that will not shift can be enough to put a replacement board in the shopping basket. Yet solid wood often has far more life left in it than you might expect. One straightforward, virtually free step can give an old board a second life – and prevent an expensive mistake at the kitchen counter.
Why a worn wooden chopping board is rarely beyond saving
A solid chopping board made from beech, oak, walnut or ash is not a disposable item. Wood changes over time, but it can also be worked and refreshed. Many makers and woodworking workshops follow this principle of long-lasting kitchen equipment: buy quality once and care for it, rather than replacing a cheap board every few years.
Wood offers several benefits. It is durable, hygienic and repairable – and it simply looks better on a worktop than a thin plastic board. The scratches, grey patches and discolouration that develop after years of daily use are usually cosmetic issues only. In many cases, the material beneath remains completely sound.
A board should only genuinely be removed from the kitchen if it shows particular warning signs:
- deep cracks where dirt or liquids can collect;
- black, soft patches caused by mould;
- a persistent musty or rotten smell even after thorough cleaning;
- severe warping that makes the board wobble or tip.
If none of these applies, restoring the chopping board is worth trying. You need neither specialist tools nor costly care products.
The zero-cost trick: sand and oil instead of throwing it away
The key technique has two simple stages: sanding, followed by oiling. Both can be done with items already found in many homes, or bought from a DIY shop for only a few pounds.
Step 1: Remove years of wear with sandpaper
First, check that the board is made from solid wood rather than merely having a thin top layer. For solid boards, a piece of 180- to 240-grit sandpaper, the sort often kept in a shed or workshop, is usually enough.
Proceed as follows:
- Clean the board thoroughly and allow it to dry completely.
- Sand only in the direction of the wood grain, never across it at random.
- Use light pressure, making several gentle passes over the same area if necessary.
- Work over both the surface and the edges until the deepest cuts are noticeably reduced.
- Wipe away sanding dust with a slightly damp cloth, then leave the board to dry again.
“After only a few minutes of sanding, a dull, grey block of wood looks lighter, smoother and far better cared for again – almost like a new board from the shop.”
Step 2: Nourish the wood with food-grade oil
The second stage is what turns a board from merely “clean” into properly restored. Wood dries out over time, becoming dull and absorbing moisture more quickly. A light coating of oil not only revives its colour, but also helps protect it from fresh stains and water.
Suitable options include:
- refined sunflower oil;
- refined rapeseed oil;
- food-grade linseed oil.
For this care treatment:
- Place a few drops of oil in the centre of the dry board.
- Spread it thinly using a lint-free cloth, covering the top, underside and every edge.
- Let it soak in for at least one hour, or longer for thick wood.
- Wipe off any remaining oil with a clean cloth so the surface does not feel sticky.
Once treated, the wood will appear darker and warmer, with a smooth, silky feel. Liquids will bead up more effectively, while the board will absorb fewer smells.
How often should a wooden chopping board be oiled?
A newly sanded board needs slightly more attention at first. As a general rule, apply more oil whenever the surface looks dry, faded or brittle. With ordinary use, re-oiling every one to three months is generally sufficient.
If you do a lot of chopping, regularly work with water, or often use the board to serve cheese, cured meats or bread, you can reach for the oil more frequently. Very little is needed: one teaspoon is entirely enough for a medium-sized board.
Everyday rules to keep a restored chopping board looking good
Even the best care treatment will achieve little if the board is handled incorrectly day to day. A few simple habits will make the renewed surface last much longer.
What wood really does not like
- No dishwasher: Heat, water and detergent attack the wood, causing it to warp and potentially crack.
- No prolonged soaking: Water penetrates deeply, making the board swell before it dries unevenly.
- No intense heat: Never dry wood on a radiator or immediately beside heating, as this encourages cracking.
- No harsh cleaners: Chlorine and aggressive chemicals damage the surface and its natural protective layer.
How to clean it properly
For daily cleaning, this simple routine is normally enough:
- Scrape away large food remnants after chopping with a spatula or knife.
- Wash the board using hot water and a little washing-up liquid.
- Dry it immediately with a cloth.
- Stand the board upright so air can reach both sides.
For strongly scented foods such as onions or garlic, one short additional step helps: sprinkle on a little coarse salt, rub it in with half a lemon or a brush, leave it briefly, then rinse, dry and you are done.
Hygiene: when an extra board makes sense
Many kitchen professionals recommend a clear separation: one board for meat and fish, another for bread, vegetables and fruit. Boards with heavy scoring are better used for dry foods, as germs can remain more easily in deep grooves.
If you sand and re-oil a wooden board thoroughly, you can deliberately give it a new role: a former, heavily used meat board can become a vegetable board, for example, while a smoother, newer board is reserved for raw foods.
Why restoring an old wooden chopping board pays off twice
Restoring a wooden board in this way does more than save money. Every board kept in use also means less waste, lower resource consumption and less frustration at seeing an expensive favourite end up in the bin. High-quality solid-wood boards in particular can last for many years, and often even decades, with a little care.
“A sheet of sandpaper from the workshop and a bottle of oil from the kitchen – that is usually all it takes to give a seemingly worn-out wooden board a new life.”
Once you have tried sanding, the method is often quickly applied to other kitchen tools: rolling pins, breakfast boards, serving boards and wooden spoons benefit just as much from fine sanding and a thin coating of oil. Gradually, this creates a kitchen where less is thrown away and more is repaired.
A brief look at wood-care terms can help put things into context: “180 to 240 grit” refers to medium-fine sandpaper, which removes enough material without creating deep new scratches. “Food-grade oil” means that the oil is approved for consumption and cures or remains stable without going rancid. Specialist wood-care oils for chopping boards generally follow the same principles, but are not essential.
Anyone who makes this straightforward care routine part of everyday kitchen life will soon notice the difference: an unremarkable wooden board becomes a useful favourite again. And it can all be done without expensive specialist products – just with a little time, sandpaper and a few drops of oil.








Comments
No comments yet. Be the first to comment!
Leave a Comment