A small change in technique can transform the result.
Anyone growing tomatoes in the garden or on a balcony will know the familiar problems: fruit splits, leaves turn yellow, and fungal disease can suddenly take hold. Watering is usually blamed straight away – too much, too little, or at the wrong time. Yet the issue is often not simply the volume of water, but the way it reaches the soil and the condition of that soil.
Why tomatoes can wilt despite plenty of water
Tomatoes are thirsty plants, yet they react badly to an inconsistent water supply. Going without water for several days and then receiving an entire watering can at once puts them under stress.
Common signs of watering problems include:
- tomato fruit splitting after heavy rain or thorough watering
- yellow, dry leaves caused by lack of water
- soft, mushy stems when roots are sitting in wet soil
- increased fungal disease when foliage is repeatedly wetted
“What matters less is how much you water, but how consistently the plants receive water and how well the soil retains it.”
Garden experts therefore advise watering tomatoes deeply but not too frequently. Water should penetrate down to the roots instead of dampening only the top few centimetres. A slow flow is ideal – for instance, from a drip hose or a watering can with a narrow spout aimed directly at the soil.
The biggest mistake: watering from above
Using a sprinkler or hose over the plants because it is convenient can cause long-term harm. The leaves remain wet for a long time, especially within dense tomato growth. These damp surfaces are exactly what fungi such as tomato blight thrive on.
A better approach is to:
- water only around the root area, never over the leaves
- water in the morning or early evening, rather than in the midday heat
- water deeply less often instead of giving small, surface-level amounts every day
Even if you already follow these steps, one key element for healthy plants is often missing: properly prepared soil that can hold water and smooth out fluctuations.
The overlooked job before the watering season
Before intensive summer watering begins, tomato plants need a protective layer directly on the soil. This task is surprisingly easy to overlook, although it takes only a few minutes and continues to work for weeks.
“Anyone who covers the root area of their tomatoes with a protective layer in good time stabilises the soil microclimate and makes the plants much more resistant to stress.”
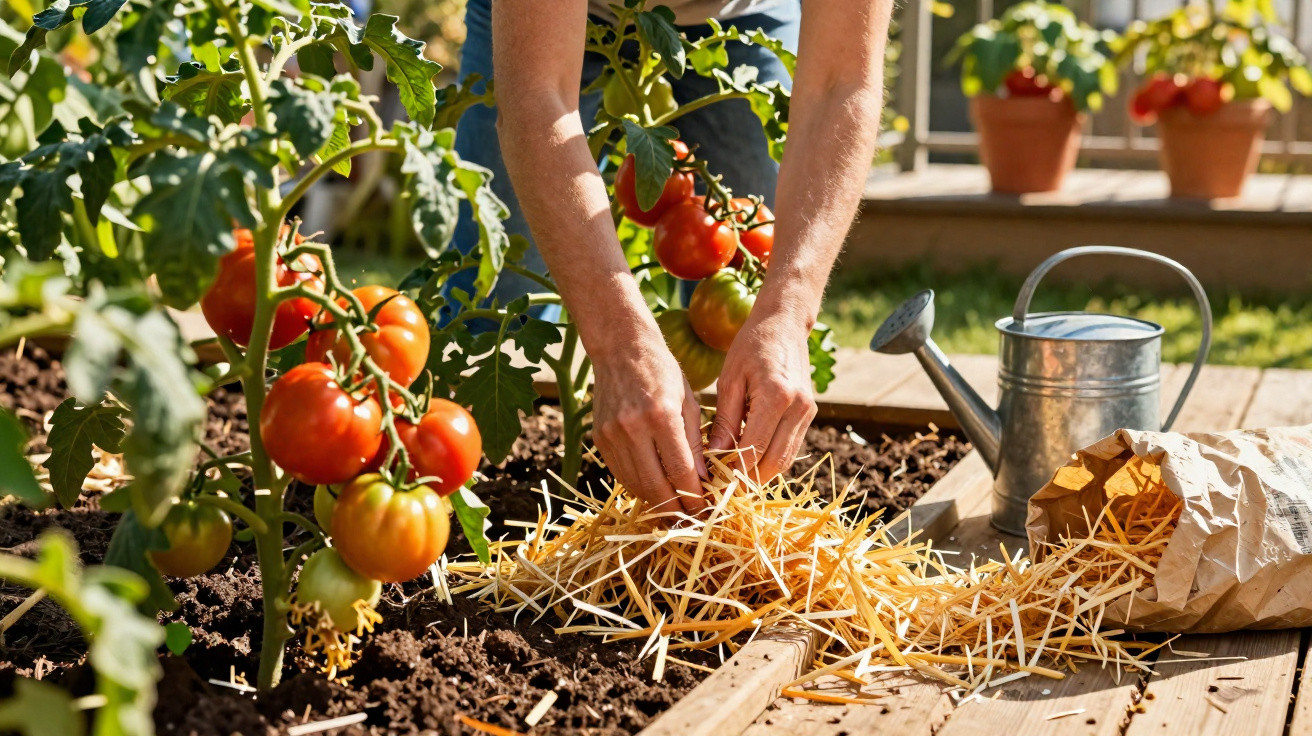
This layer is called mulch. It consists of organic material spread loosely over the soil around the stem. It covers the ground like a blanket, so wind and direct sun no longer hit the surface as intensely.
Mulching tomatoes: how the protective layer works
Mulching means covering the bare soil surrounding each tomato plant. It offers several benefits at once:
- water evaporates far more slowly
- the soil stays loose and crumbly for longer
- temperature changes are moderated
- weeds have fewer opportunities to grow and do not take nutrients from the tomatoes
Suitable materials for a mulch layer include:
| Material | Benefits | Notes |
|---|---|---|
| Straw | Dries quickly, lasts a long time and is readily available | Do not pack it too densely, so air can reach the soil |
| Shredded leaves | Recycled garden material that improves the soil over time | Shred them as finely as possible to prevent clumping |
| Mature compost | Provides nutrients while protecting against drying out | Apply sparingly, as it is highly nutrient-rich |
As a guide, a layer around 5 to 10 centimetres deep around each plant is enough. Importantly, the mulch must not sit tightly against the stem; leaving a small gap helps prevent rot at the base.
When to apply the mulch layer
Good gardeners do not wait until the heat has already arrived before thinking about mulch. It makes sense to lay the first layer once the soil begins warming in spring – usually in March or April outdoors, and often a little earlier on a balcony.
After planting out tomatoes in May, the layer can be topped up or added again lightly. If the ground is already completely dry at that point, water it thoroughly first and mulch afterwards. This traps the existing moisture in the soil.
How to water tomatoes correctly when the soil is mulched
A mulch layer also changes how you should water. Many people continue watering exactly as before, then wonder why the surface appears dry. Beneath the mulch, conditions are often very different.
Before every watering session, use this simple check:
- Gently move the mulch aside.
- Push a finger 3–5 centimetres into the soil.
- Check whether the soil still feels cool and slightly damp.
“If the soil beneath the mulch still feels fresh, tomatoes generally do not need water – even when the surface looks dry.”
Only when the soil is dry several centimetres down is it worth watering thoroughly. Then water slowly at the base of the plant, allowing the water to run beneath the mulch. This keeps leaves, stems and fruit as dry as possible while ensuring the roots receive what they need.
Why mulched tomatoes are often healthier
Garden experts repeatedly observe that tomatoes in mulched beds grow more strongly and are less vulnerable to disease. There are several reasons for this:
- The soil dries out less, so the roots experience stress less often.
- Consistent moisture reduces the risk of fruit splitting.
- Soil splashes carrying fungal spores are less likely to reach the leaves.
- Organic material gradually makes the soil more fertile.
Many amateur gardeners report better flavour and sturdier plants when they mulch early and consistently water only at the base. The plant has less to “repair” and can direct more energy into flowers and fruit.
Common mistakes when mulching tomatoes
The method is straightforward, but small mistakes are common and can reduce its benefits:
- Pressing mulch directly against the stem: this raises the risk of rot.
- Using piles of fresh grass clippings: they can rot and bind a great deal of nitrogen.
- Creating a layer that is too thick and airtight: the soil may begin to go mouldy.
- Mulching very wet, cold soil in spring: this slows the warming of the ground.
Taking a gradual approach, checking regularly and replacing material where necessary will quickly give you a sense of the amount and material that suit your garden.
How balcony and container gardeners benefit
This technique is not limited to traditional vegetable gardens. Tomatoes in pots and containers are particularly prone to drying out quickly because sun and wind reach the containers from every side.
A thin mulch layer helps here as well. It is also worth:
- using light-coloured pots, which heat up less
- filling saucers with water only briefly after watering, rather than leaving them full permanently
- carrying out the moisture check beneath the mulch in the morning and evening during very hot weather
For pots on a balcony, decorative materials such as chopped coconut fibre can be used instead of straw. The effect is similar: the surface stays cooler, and the plant gets through the summer with far less watering stress.
Ultimately, it is not the size of the watering can but the preparation of the soil that determines whether tomatoes grow vigorously and produce flavoursome fruit. A simple mulch layer and a quick check of the soil before every watering can make the difference between vulnerable and resilient plants – and take only a few minutes of work.













Comments
No comments yet. Be the first to comment!
Leave a Comment