You bend down, simply intending to change your shoes quickly, and there it is again: that pull deep in your hip, like a small barb beneath the skin. We all know that moment when the body says “stop” while the mind is still racing ahead.
A runner beside you on the bench rubs her side; a CrossFit athlete stretches his legs, grimaces and takes a sip of his shake. The trainers call goodbye, the fluorescent lights flicker as the door swings open. The end of the working day is waiting outside – but the question remains inside: what can you do now to stop it niggling again tomorrow?
Later, a physiotherapist demonstrates a movement so subtle that it is almost imperceptible. No spectacle, no cracking, no big drama. The answer lies in millimetres.
Why your hip complains after exercise
Following a hard session, the hip can often feel tight, as though somebody has tightened the screws. Shortened hip flexors and overworked gluteal muscles are often the pair quietly pulling the strings. It sounds simple – and it is, until it becomes irritating enough to stop you running.
Picture Jana, 34, with a desk-based job and an after-work run along the canal. She spends eight hours sitting, then sprints up the bridge. Her hip flexor has been working since the morning, while her glutes have been off duty. By the end of the third kilometre, she feels a niggle at the side: a dull pull that lingers when she climbs stairs.
Anatomically, the pieces fit together: the iliopsoas sits at the front of the pelvis, while the tensor fasciae latae (TFL) is at the side. Both can pull when you sit a lot and train hard. They may draw the hip into a slight forward tilt, leaving the lumbar spine to take over and the glutes to switch off. This creates tension that can feel like “pressure in the joint”.
The simple hip flexor stretch physiotherapists love
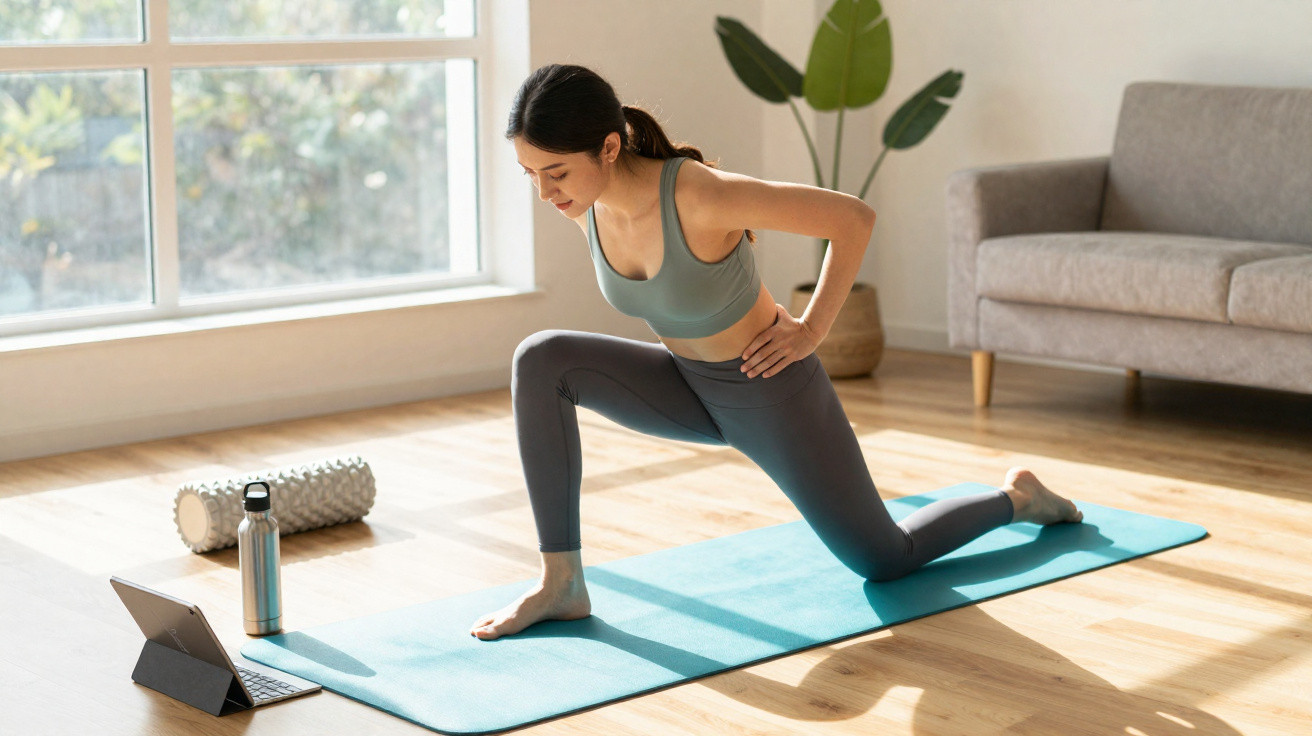
The half-kneeling hip flexor stretch is understated but precise. Move into a kneeling position: place your right foot in front and your left knee on a mat. Now actively tuck your pelvis under, as if you were drawing the zip of your trousers towards your navel – posterior pelvic tilt. Can you feel a gentle stretch at the front of your left hip? Hold it and take five slow, deep breaths.
Keep your torso upright, gently brace your abdomen and lightly squeeze the left side of your glutes. If you want a little more, raise your left arm, reach towards the ceiling and lean very slightly to the right. Do not force the position; make fine adjustments instead: move forwards by a centimetre, sideways by two millimetres, then breathe. Change sides. Two rounds are often enough before you head to the shower.
Common mistakes include tipping forwards as though dropping into a lunge, arching the lower back and flaring the ribs. That sends the stretch beyond its target. Put a cushion beneath your knee if the pressure feels uncomfortable. If you notice your back taking over, ease back slightly and find the pelvic movement again. Breathing releases more than force does.
Common pitfalls – and how to avoid them
This exercise works through precision, not by doing “more”. Anyone who aggressively pushes their upper body forwards ends up loading the hip joint rather than stretching the muscle. Start small, maintain the pelvic tilt, then breathe your way deeper into the position. Five calm breaths on each side, for two to three rounds, is enough.
Let’s be honest: nobody really does this every day. Schedule it for the days after demanding runs or heavy squats, ideally in the evening before settling on the sofa. If your knee complains, switch to the standing version: place your foot on a low step, tuck the pelvis, lean slightly forwards and lift your arm. There should be no pain, only a pleasant pull.
“Most people only realise how tight their hips are once they learn to move their pelvis deliberately. Less leverage, more control – that is when the relief comes,” says an experienced physiotherapist.
- Key cue 1: Breathing matters – take 5 calm breaths; do not rush.
- Key cue 2: Pelvis first, movement last.
- Key cue 3: Gentle glute tension keeps the hip aligned.
- Dosage: 2–3 sets per side, 3–5 days per week.
- Stop signal: Sharp pain? Stop the exercise and get it checked.
Think beyond simply pushing it away
The hip is a small transport hub. When movement is held up, signals from the back, thigh and pelvic floor can build up. The stretch creates space, nothing more – and that is precisely where its strength lies. Creating space gives the body options again.
Perhaps you will notice that your next run starts more smoothly, or that your stride becomes longer without you trying to lengthen it. Or perhaps you will simply find that putting on your shoes no longer feels like a small test. That alone is a gain.
Want more in the long term? Pair the stretch with two sets of glute bridges or lateral leg raises. Release tension, add stability, then tidy up everyday movement – in that order. Patience wins, not one grand effort on a Monday evening.
| Key point | Detail | Benefit for the reader |
|---|---|---|
| Understand the cause | Hip flexors and the TFL are often shortened after sitting and exercise | Understands why the hip niggles after training |
| The kneeling exercise | Tuck the pelvis under, lift the arm and hold for 5 breaths | Provides clear step-by-step guidance |
| Avoid mistakes | Do not arch the lower back or “push” forwards; control your breathing | Feel the effect sooner without overloading |








Comments
No comments yet. Be the first to comment!
Leave a Comment