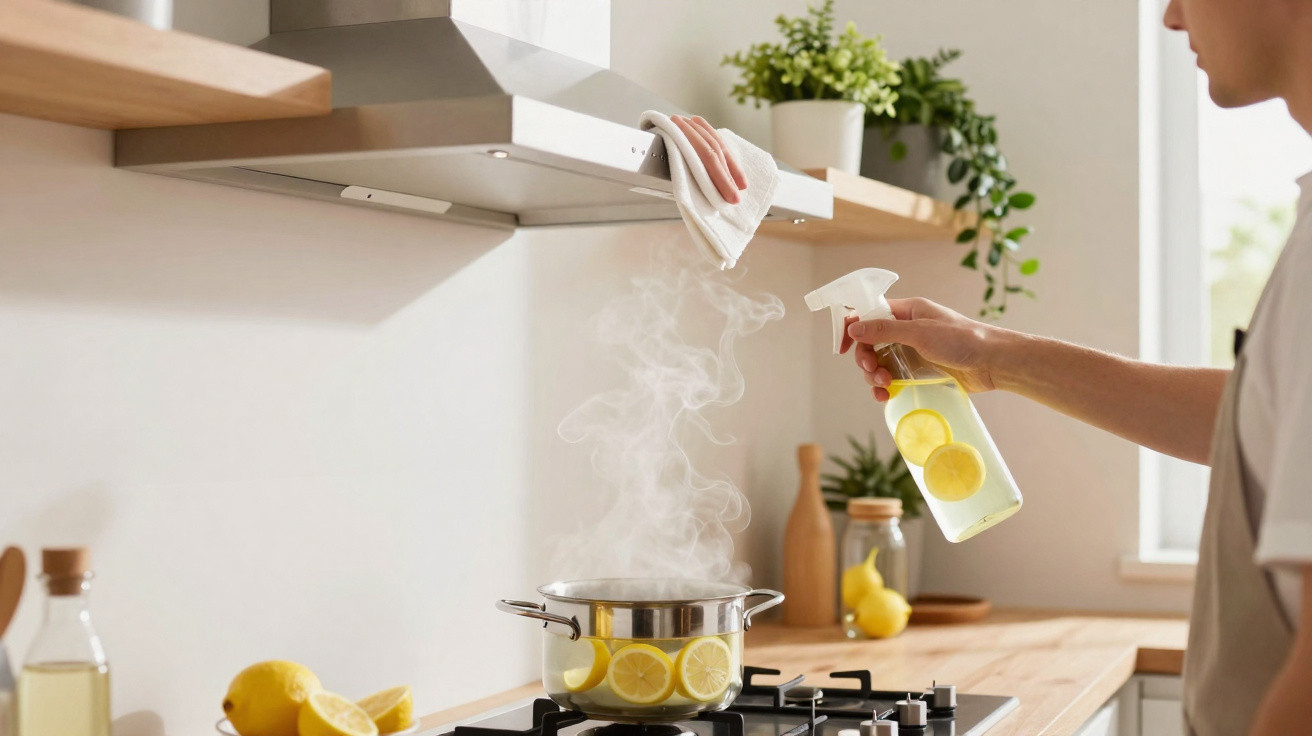
Anyone who enjoys cooking will know the situation: the pan is sizzling, sauce splatters, the extractor hood hums away – quietly collecting grease, dust and oily vapours. Eventually, everything becomes sticky, the airflow weakens and cooking smells linger in the kitchen for longer. This is where a remarkably straightforward, almost old-fashioned method comes in: it needs no specialist cleaner and leaves the extractor hood fresh again.
Why the extractor hood becomes greasy so quickly
Every time you cook, greasy vapours rise upwards. The extractor hood captures them so they do not settle on walls, ceilings and cupboards. Instead of remaining in the air, the residue collects in the hood itself: on its exterior, in the filters and inside the unit.
“A neglected extractor hood runs more loudly, extracts less effectively and spreads grease particles throughout the kitchen.”
Modern stainless-steel hoods in particular can look marked after only a few days. Fingerprints, splashes and a fine greasy film can soon turn a stylish appliance into a dull focal point. Simply wiping over it with kitchen roll usually spreads the grease rather than removing it.
How often should the extractor hood really be cleaned?
The good news is that there is no need to scrub it every day. A simple routine is enough to keep the hood hygienic and working properly for a long time.
- Exterior surfaces: wipe once a week with a mild cleaner or household remedy
- Metal grease filters: degrease thoroughly roughly every 4 weeks
- Interior: check every 1–2 months and clean when necessary
- Activated-carbon filters (for recirculating hoods): replace every 3–6 months, depending on use
If you fry regularly or prepare deep-fried food, these intervals should be considerably shorter. High-heat frying produces especially fine, stubborn grease vapours that can seem to bake themselves onto surfaces.
The “magic” method: dissolving grease with water and lemon
The main trick seems almost too simple: water and lemon. Yet this combination delivers surprisingly strong results, especially for stainless-steel and aluminium extractor hoods.
Step 1: Prepare the lemon solution
First, make a straightforward mixture for cleaning the outside:
| Ingredient | Quantity | Note |
|---|---|---|
| Water | 1 litre | bring to the boil if possible |
| Lemon juice | juice of 1–2 lemons | more juice provides greater degreasing power |
Bring the water briefly to the boil, remove it from the heat and stir in freshly squeezed lemon juice. Allow the mixture to cool slightly so that it remains hot but is no longer boiling. This protects your hands without reducing its cleaning strength.
Step 2: Degrease the exterior surfaces
Use a soft sponge or microfibre cloth to apply the warm lemon solution across the whole extractor hood, including the underside, edges and control panel. On heavily soiled patches, hold the sponge in place for a little longer to let the grease loosen instead of scrubbing immediately.
“Citric acid breaks down grease, neutralises odours and leaves a light shine – without any harsh chemical smell.”
Then wipe the surfaces with a clean, lightly damp cloth and dry them thoroughly. This helps prevent streaks, particularly on stainless steel.
The steam trick: let the extractor hood cook along
This method becomes especially useful when deeper cleaning is needed. Rather than working against the cooking steam, the hood works with it.
Lemon steam for filters and the interior
For stubborn, dried-on layers of grease, use the same lemon solution again – this time directly on the hob:
- Place a pan of the water-and-lemon mixture on the hob
- Switch on the extractor hood; a medium setting is often enough
- Boil the mixture for several minutes until it produces plenty of steam
As the lemon steam rises, it reaches the underside of the extractor hood, passes into the filters and settles inside the unit as well. Heat loosens the grease, while the lemon acid breaks down its structure. After this “steam treatment”, crusted residue is much easier to remove.
Once the hob has been switched off, let the extractor hood continue running for a few more minutes. Then wipe the exterior and, where accessible, the interior with a cloth and a little fresh lemon solution.
If the grease crust is already extreme: vinegar as plan B
Some extractor hoods have simply gone untouched for too long. Sticky brown layers that barely rub away need a stronger mixture. Ordinary white household vinegar can help here.
Boil some water, allow it to cool a little, then mix it with vinegar in a 1:1 ratio. Apply the solution to a sponge and work carefully over the affected areas. The acid attacks the grease layer and gradually loosens it. For particularly stubborn patches, soak the sponge again and leave it in place for a few minutes.
“Vinegar is especially suitable when grease has dried into a dark layer – the smell soon disappears if the hood is left running briefly afterwards.”
Important: use this mixture cautiously on sensitive wooden sections or painted fronts, and never apply it dripping wet. It is better to test it first in an inconspicuous area.
Filter care: where most of the work lies
The visible section of the hood tells only half the story. Much of the grease is trapped in the metal filter – and this filter determines how effectively the extractor hood actually draws air.
Cleaning metal filters correctly
Most metal filters can be removed from the hood with a single release catch. Hold one up to the light: if hardly any light passes through, it is definitely time to clean it.
A possible method:
- Soak the filter in hot water with a little washing-up liquid and, if desired, a splash of vinegar or lemon juice
- After several minutes, rub the fins with a soft brush or sponge
- Rinse thoroughly with clean water
- Leave it to dry completely before fitting it back in place
Some filters can even go in the dishwasher. If yours can, place it in the top rack, select a hot programme and avoid aggressive dishwasher powder to prevent damage to the surface. The hood’s instruction manual will state what is permitted.
Materials: what to watch out for
Not every extractor hood is made from stainless steel. Many kitchens combine glass, plastic, wood and metal, and each material responds differently to acids, heat and abrasion.
- Stainless steel: tolerates lemon and vinegar solutions well, provided they are not left on for hours and no abrasive sponges are used.
- Aluminium: is more sensitive to strong acids, so use a diluted solution and rinse thoroughly afterwards.
- Glass surfaces: can be cleaned very effectively with lukewarm lemon solution and a microfibre cloth, with minimal streaking.
- Wood or wood-effect finishes: wipe only with a lightly damp cloth; avoid dripping acids, as the material may swell or discolour.
What a clean extractor hood does for health and comfort
A well-maintained extractor hood is not just about appearance. It directly affects the air quality in your home. Clean filters capture more grease, air circulates better and cooking odours disappear faster.
“Anyone who regularly degreases their extractor hood reduces fine particulate matter in the kitchen and lowers the risk of mould and odours developing.”
There is another consideration: in heavily greased filters, high heat can, in extreme cases, create ignition points. The risk is low, but it exists – particularly with gas hobs and very old hoods that have never been cleaned. Regular cleaning noticeably reduces this risk.
A realistic scenario: 30 minutes well spent
A typical cleaning session could work like this: after breakfast at the weekend, remove the filters and leave them to soak in a hot washing-up solution. While they soak, prepare the lemon pan and treat the hood with steam. Then wipe down the exterior, brush the filters, rinse them and leave them to dry. After around half an hour, the job is done for several weeks.
This routine makes the kitchen look more cared for, even if the worktop is not perfectly tidy. Visitors notice smells and sightlines most of all – and the extractor hood is right at the forefront of both.
Why natural remedies pay off in the long term
Many kitchen cupboards are already crammed with specialist cleaning products: degreasers, stainless-steel sprays and fragranced cleaners. The lemon-and-vinegar method may seem unremarkable by comparison, but it saves money over time while being gentler on both surfaces and airways.
Fewer chemicals in the air also mean fewer irritants for sensitive people, children and pets. Cleaning feels easier too when harsh fumes are not hanging in the room. The barrier to “quickly doing the hood” becomes much lower.
Once the simple lemon trick has become part of everyday life, the appliance is viewed differently: not as an annoying grease trap, but as a permanent part of the kitchen that makes a noticeable contribution to comfort at home – quietly, reliably and without a chemical spectacle.
















Comments
No comments yet. Be the first to comment!
Leave a Comment