On Sunday morning, the kitchen already smells of coffee as the bread comes out of the oven. Through the glass, it looks flawless: golden, risen and almost proud of itself. Then comes the first cut with a knife. Rather than the expected crackle, the blade sinks into a slightly soft crust. We have all experienced that small disappointment. You followed the recipe, weighed the flour and waited for the dough to prove, yet the result lacks that sharp sound associated with the local bakery. The good news is that this sought-after crunch is not some mysterious skill reserved for professionals. It mostly comes down to a few techniques that are often overlooked at home. And it all starts long before the loaf goes into the oven. Bread has its own preferences and responds well when they are respected. That crackling crust is within reach.
A crunchy crust begins with water and heat
When a baker loads baguettes into the oven, a cloud of steam surrounds the dough pieces for the first few minutes. This unobtrusive detail makes all the difference: moisture delays the setting of the crust, allowing the bread to expand freely before the surface dries and firms up at the end of baking. In a domestic oven, the air is often too dry from the outset. As a result, the crust sets too early, the loaf rises less, and its outer layer lacks delicacy. The desired crunch is therefore not a thick, armour-like crust. It is a thin, deeply coloured layer that sings when it breaks.
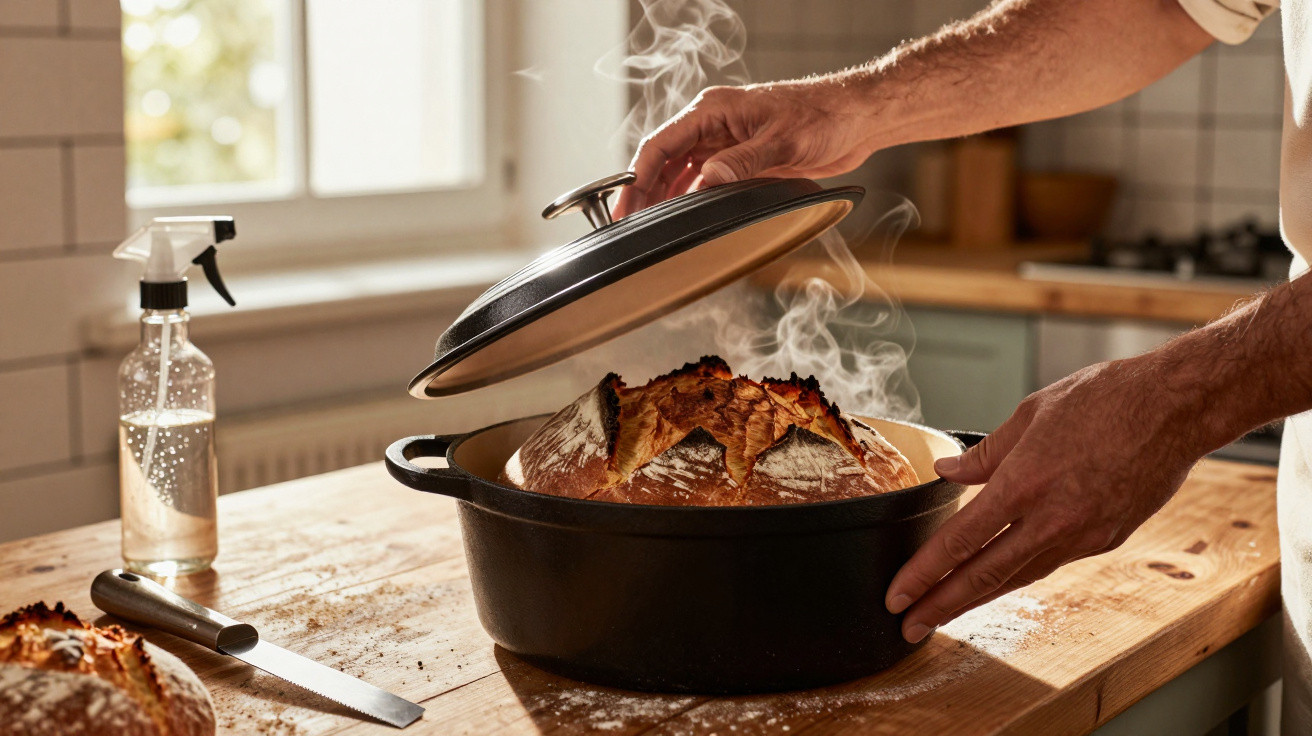
A cast-iron casserole dish can recreate this effect with surprisingly little effort. Put the dough into a thoroughly heated covered pot, and the water within the dough turns to steam, remaining around the loaf. Remove the lid after twenty to twenty-five minutes: browning begins, the crust tightens and takes on the hazelnut shade seen in bakery windows. Many home bakers notice a clear difference on their very first attempt. Baking at 240 °C for around 45 minutes, depending on the loaf’s weight and the oven’s power, will often produce a highly convincing result.
Oven heat matters just as much as steam. Bread placed on a merely warm tray receives heat slowly from underneath, which can leave the base pale and the crust less dry. A pizza stone, baking steel or even a roasting tray preheated for thirty to forty minutes makes a noticeable improvement. That thermal shock helps the loaf expand, in what bakers call oven spring. Start with a properly high temperature, then reduce it slightly if necessary to finish baking without scorching the surface. The oven needs to be hot-truly hot-not simply “nearly ready”.
Simple home-baking steps that make a real difference
The easiest method is to preheat the oven to 250 °C with an empty tray on the bottom shelf. As you put in the bread, quickly pour a small glass of hot water into the tray, then close the door without delay. The resulting steam is often enough to turn an ordinary loaf into much crunchier bread. Another option is to lightly mist the oven walls with water, never directly onto the light or heating elements. For a baguette or shaped loaf, making a clean slash with a sharp blade also lets internal steam escape in the right place.
The most common mistake happens after baking: the bread is placed on a plate or solid board, or worse still, covered with a tea towel to “keep it warm”. The intention is sensible, but steam escaping from the loaf becomes trapped and quickly softens the crust. Instead, place the loaf on a wire rack, with nothing beneath it, for at least an hour. Yes, waiting is frustrating when the smell fills the home. Let us be honest: hardly anyone does this every day. Even so, slicing a piping-hot loaf will often sacrifice its crunch and squash a crumb that is still delicate.
Ingredient choice and fermentation time also affect the outcome, although baking remains the decisive stage. A sufficiently hydrated dough-around 70% water for standard wheat flour-encourages an airy crumb and a thinner crust. Dough that is too dry, on the other hand, often produces a dense loaf that dries out without becoming truly crisp.
“For a crust that sings, you need heat at the beginning and air when the bread comes out of the oven.”
- Preheat thoroughly: allow at least 30 minutes at maximum temperature with the tray, stone or casserole dish inside.
- Create steam for the first 15 to 20 minutes, using a covered casserole dish or a tray of hot water.
- Finish baking uncovered so that the crust can dry, brown and become brittle.
- Cool the loaf on a wire rack, even if it seems to be calling to you from the worktop.
- If the crust softens the following day, put the bread directly on the oven rack at 180 °C for 5 to 8 minutes.
The small ritual for bakery-style bread
Achieving a crunchy crust like one from a bakery does not mean turning your kitchen into a laboratory. It is more about seeing your oven differently: as a sometimes temperamental source of heat that needs to be mastered with a preheated tray, a little steam and proper resting time. Every oven tells a different story. For some, 230 °C is enough; for others, the temperature needs to be higher or the baking time extended by five minutes. Bread teaches patience, but it also allows room for trial and error. A loaf that is too pale, a crust that is too hard or a slightly damp base soon become useful reference points.
Ultimately, what remains is that very simple moment when you hear the crust give way beneath your fingers. A successful loaf is not defined by appearance alone, although its golden colour is always pleasing. There is steam rising as it is opened, crumbs on the table, butter melting too quickly and the sense that life has slowed down a little. Sharing a photograph of your first loaf, comparing family tips or trying a casserole-dish bake can even become a small weekend ritual. The bakery is never far away: it often begins with a properly hot oven.
| Key point | Detail | Benefit for the reader |
|---|---|---|
| Steam at the start | A covered casserole dish or hot water on a tray during the first few minutes. | A thin, glossy crust and a loaf that rises better. |
| A very hot baking surface | Stone, steel or tray preheated for at least 30 minutes. | More even baking and a properly crunchy base. |
| Cooling on a wire rack | The bread needs to breathe, without being covered or left flat on a surface. | The crunch remains instead of disappearing into trapped steam. |









Comments
No comments yet. Be the first to comment!
Leave a Comment