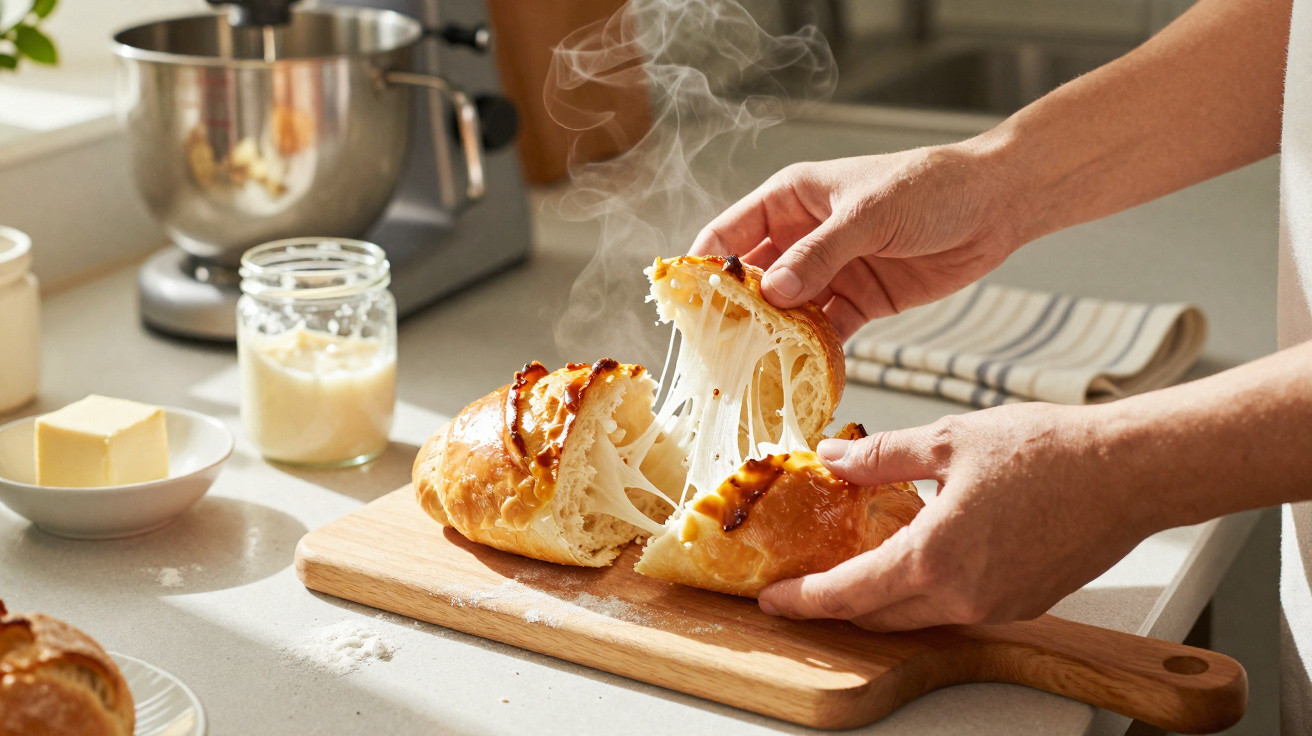
The aroma of warm butter, a golden crust and an interior as soft as cotton – all achieved without professional equipment or patisserie training.
Many people shy away from making brioche because it sounds like ‘advanced baking’. In reality, it mainly comes down to a sensible sequence, a little scheduling and a few precise techniques. With clear guidance, this yeasted-dough mystery becomes an easy weekend project that turns any kitchen into a miniature bakery.
Why an easy brioche recipe is so popular
Yeasted dough is enjoying a revival: social media feeds are packed with plaits, cinnamon buns and loaves. Brioche stands apart because it sits somewhere between cake and bread: buttery yet not overly sweet, soft while still holding its shape. It is ideal for breakfast, brunch or Sunday coffee.
A good brioche is not made with magic tricks, but with precise quantities, gentle handling of the yeast and sufficient resting time.
The method described here is deliberately designed for people without a stand mixer or professional oven. Use a hand mixer with dough hooks if you have one, but you can achieve the result with your hands alone. The quantities make one large loaf of roughly 1 kg, making it perfect for a family or two leisurely breakfasts.
Ingredients for a fluffy brioche
For a brioche weighing approximately 1 kg, you will need:
- 500 g wheat flour (Type 405 or 550)
- 60 g sugar
- 10 g salt
- 20 g fresh baker’s yeast (or the corresponding quantity of dried yeast stated on the packet)
- 200 ml lukewarm milk (approximately 20–22 °C)
- 3 eggs (approximately 150 g in total, without shells)
- 200 g softened butter (at room temperature)
- 1 extra egg, for glazing
Two details are crucial: the yeast must be fresh, rather than grey, dry or crumbly, and the milk should only be lukewarm. Liquid that is too hot weakens the yeast, while milk that is too cold slows it down.
Step by step to an airy brioche
Make the preferment
Stir the yeast into the lukewarm milk along with around 10 g of the sugar. The milk should feel pleasantly warm rather than hot. Leave the mixture for 5–10 minutes, until a light foam appears on the surface. This indicates that the yeast is active.
Combine the dry ingredients
Mix the flour, remaining sugar and salt in a large bowl. Make sure the salt does not come into direct contact with the yeast at this stage, as too much salt reduces its raising power. Create a well in the centre.
Work in the eggs and yeast milk
Pour the yeast milk into the well, add the eggs and start bringing everything together into a dough. At first, the mixture will seem sticky and awkward to handle. This is entirely normal. After several minutes of kneading, it will become smoother and more manageable.
Add the butter gradually
Only introduce the butter once the dough has developed some structure. Incorporate the softened butter piece by piece, continuing to knead throughout. If using a stand mixer, let it work for 10–15 minutes. Hand-kneading may take a little longer.
The dough has been kneaded enough when it is smooth, elastic and still slightly sticky, yet releases from the sides of the bowl.
First rise at room temperature
Shape the dough into a ball, place it in a lightly floured bowl and cover it with a clean tea towel. Leave it at room temperature until it has roughly doubled in volume. Depending on the temperature of the room, this will take around 1–2 hours.
Briefly deflate and chill overnight
Once the first rise is complete, gently press down the dough with a flat hand. The aim is to reduce the larger air bubbles without tearing the dough. Transfer it to a covered container and refrigerate it, ideally overnight. This long, cool resting period develops more flavour and produces a fine, even texture.
Shape the brioche and allow a second rise
Take the dough from the fridge the following day and let it sit briefly at room temperature. You can then choose your preferred shape:
- A classic plait in a loaf tin
- Several small balls arranged in a round tin
- A wreath shape for the brunch table
Place the shaped brioche in the prepared baking tin and leave it to rise again until noticeably puffed up – once more, by around half to almost double its volume, at approximately 20–22 °C.
Bake for a golden crust
Preheat the oven to 170–180 °C conventional heat. Beat the remaining egg and gently brush it over the brioche’s surface without pressing the dough down. Bake for 25–30 minutes, depending on the size and shape.
The brioche is ready when it is a deep golden brown and sounds hollow when you gently tap its underside.
The small details that make a real difference
Keep an eye on the temperature
Yeast is sensitive. Both the milk and the room should be around 20–22 °C. If the dough gets too warm, it may rise quickly but will lose structure and flavour. At temperatures that are too low, the process simply takes unnecessarily long.
Patience rather than a rapid rise
Many people put yeasted dough straight onto a radiator or into a very warm oven. Although tempting, this often compromises flavour and can create uneven air pockets. A short warm rise followed by a long chilled rest generally gives the lightest result.
Add butter at the right stage
Butter makes the dough rich, but it also makes it heavier. This is why it is added only after a stable gluten structure has already formed. The dough can then support the fat without collapsing. This is precisely what creates the characteristic elastic, fibrous texture visible when brioche is pulled apart.
Luxury brioche with cream: even richer, even more tender
For an especially indulgent version, follow a variation that includes cream and slightly more butter. Increase the butter to 250 g and add around 50 g whipping cream (or crème fraîche). In return, reduce the quantity of milk by roughly 50 ml.
The result is an even softer crumb, a slightly fuller flavour and a mouthfeel that strongly recalls high-quality patisserie – ideal for special occasions such as an Easter brunch or birthday breakfast.
Serving brioche so it really shines
Freshly baked brioche is delicious on its own or simply served with a little butter, jam or honey. It goes well with coffee, but also suits a generous brunch spread with fruit, yoghurt and savoury accompaniments.
It can easily be toasted the next day. Give it a brief turn in the toaster or warm it for a few minutes in a low oven, and the outside will become crisp again while the crumb stays soft. If the bake seems a little dry, a short spell in the oven at a low temperature will help. Many people then turn it into:
- Brioche French toast
- Bread pudding with berries and vanilla sauce
- A base for sweet sandwiches with nut spread and banana
Common brioche problems – and their causes
| Problem | Possible cause |
|---|---|
| Brioche barely rises | Yeast is too old, milk is too hot, the room is too cold, or salt came into direct contact with the yeast |
| Very dense and heavy inside | Rising times were too short, kneading was too rough or the dough was not kneaded for long enough |
| Cracked surface | Dough is too dry, room is too warm, or the rise was uneven |
| Dark outside, but still raw inside | Oven is too hot, tin is too full, or there was no temperature control |
Why this brioche method suits everyday life
The active work involved is surprisingly limited. The dough spends most of its time simply developing quietly – first at room temperature, then overnight in the fridge. That is exactly what makes this recipe easy to plan: make the dough in the evening, then shape, prove and bake it calmly the following morning.
Anyone who bakes brioche twice a month will quickly develop a feel for the right consistency and rising times. Small everyday variations – a slightly colder kitchen or marginally different flour, for example – become far less daunting once you see how adaptable yeasted dough ultimately is.
A closer look at yeast, gluten and alternatives
The airy structure primarily comes from gluten, the protein network that develops during kneading and holds the gas produced by the yeast. That is why properly kneaded dough feels elastic and can be stretched easily without immediately tearing.
Those who need to bake with less gluten face a genuine challenge with brioche, as its typical ‘fibrous effect’ depends heavily on it. Gluten-free flour blends containing binding agents are available, but the texture generally remains somewhat denser. Longer rising times and a slightly higher amount of liquid can help make the crumb softer.
It is also worth considering how sugar and butter can be varied. Part of the sugar can be replaced with honey or maple syrup, while some of the butter can be substituted with a neutral vegetable oil. The character will change slightly, but it remains close enough to classic brioche to deliver its distinctive moment of enjoyment.









Comments
No comments yet. Be the first to comment!
Leave a Comment