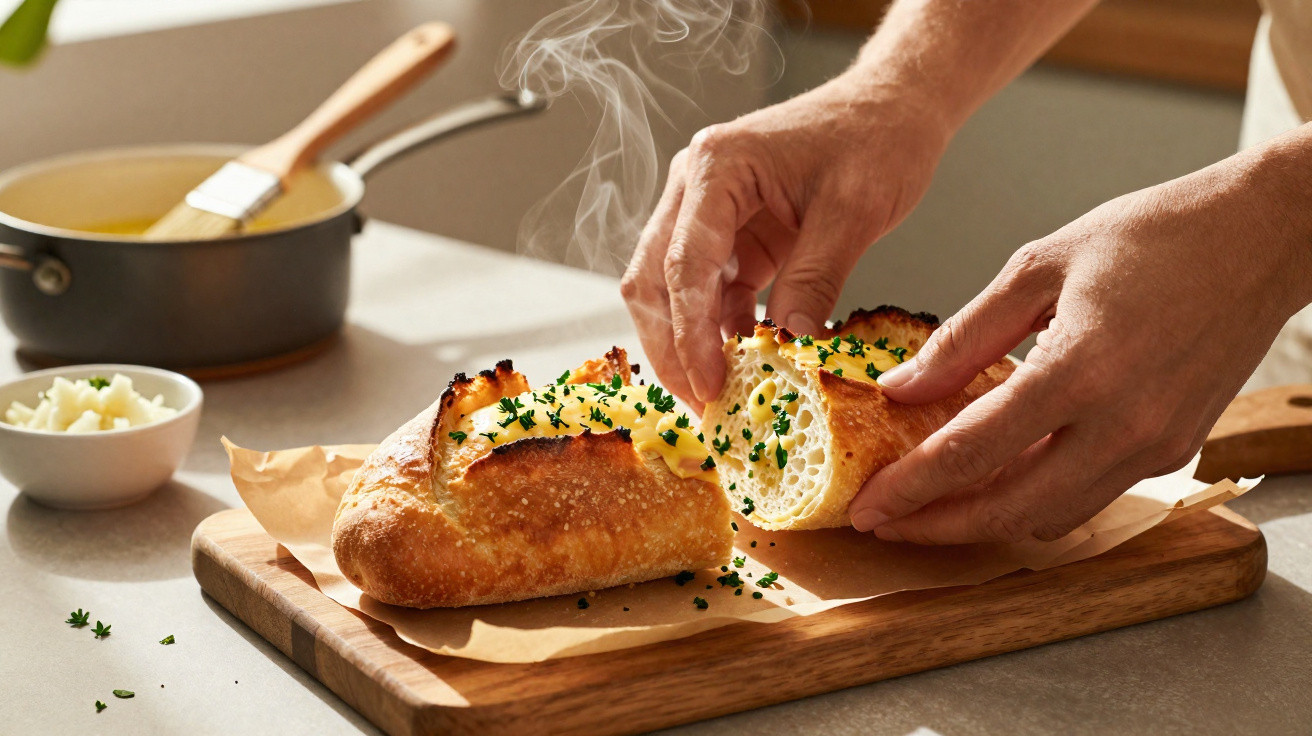
The first time I understood that garlic bread could be more than a side, I was in an overheated kitchen looking at a baking tray of pathetic, floppy slices.
They had the wonderful aroma of butter and garlic, yet each piece folded like a wet tea towel when lifted.
Naturally, everyone at the table ate it anyway, dunking it into tomato sauce while tactfully ignoring the lack of crunch.
That evening sent me into a spiral of recipes, chefs’ tips and furious Reddit discussions about “soggy garlic bread crimes”.
Between advice from a pizza chef and a shortcut from a French baker, I found one straightforward method that transformed the result.
The following batch was audibly crisp outside, with a centre as soft as a pillow.
It was the sort of bread that makes everyone fall silent for a moment.
And the secret is almost absurdly easy.
The secret begins before the oven is switched on
Most people assume exceptional garlic bread depends entirely on its topping.
More garlic, superior butter, additional cheese.
However, the delicate crackle of the crust begins long before the parsley goes on.
The key adjustment is simple: give the bread as much attention as the garlic.
Think about its crust, crumb and response to heat.
Once you do, crisp-on-the-outside, buttery-in-the-middle garlic bread becomes the norm rather than a fortunate fluke.
Imagine an ordinary weekday evening: you arrive home late, pasta is bubbling away, and you have picked up a supermarket baguette without much thought.
You hurriedly split it, spread it with cold garlic butter, wrap it in foil and put it in the oven “until it smells done”.
Ten minutes on, the kitchen has the scent of an Italian restaurant, but the bread is hot, aromatic and strangely squashy, with an oily underside stuck to the foil.
Everybody still eats it, since garlic and butter disguise plenty.
Yet no one is privately arranging their future around that particular bread.
The difference comes from using oven heat in stages rather than applying it all at once.
Start by drying and toasting the exterior, creating a slim but robust shell.
Afterwards, allow the garlic butter to permeate the still-soft middle without saturating it.
This two-stage approach addresses one basic issue: butter and moisture work against crispness.
Allow the bread to crisp independently first, then bring the buttery richness into it on your own terms.
The finished bread is indulgent in flavour but performs like a carefully designed snack.
Garlic bread technique: two heats, one perfect bite
This is the essential method for quietly turning any respectable loaf into restaurant-standard garlic bread.
Choose a baguette or ciabatta with some structure.
Cut it in half lengthways, as though opening a book, then divide it into portions if preferred.
Place the bread cut-side up on a baking tray and put it into a hot oven, without any butter at this point.
Around 5–7 minutes at a high temperature of 220°C will lightly toast the cut surface and revive the crust.
Look for edges that are only beginning to colour, rather than deeply browned bread.
As it toasts, combine softened butter, freshly minced garlic, a pinch of salt and a small splash of olive oil.
That little addition of oil lets the fat spread as a fine, even layer rather than settling in heavy, greasy patches.
Mix in chopped parsley if you want a more polished finish, or a touch of grated Parmesan for depth rather than theatrical cheese pull.
When it leaves the oven, the bread should be hot, dry and ready to absorb flavour.
Spread the garlic butter right to the edges, then return the tray to the oven for another 5–8 minutes.
The fat will now sink into the warmed crumb while the surface, already dried, becomes truly crisp.
The errors most of us make are remarkably alike.
Add too much butter at once, use an oven that is not hot enough, wrap the bread in foil “so it doesn’t dry out”, and you are soon back to soggy slices.
Realistically, nobody measures garlic or times their toast with precision every day.
It is more useful to remember an image than a formal recipe.
First toast the bread as you would bruschetta.
Then, and only then, coat it with garlic butter and finish it with more heat.
“The bread has to be ready before the butter ever touches it,” a small pizzeria owner in Naples once told me, while sliding a tray of bread under a blistering oven.
He shrugged like it was the plainest truth in the world and added, “Cold bread + hot fat = sadness.”
- Dry first, butter second – Toast the bread without anything on it so its surface sets and excess moisture can escape.
- Use softened butter, rather than melted butter – It forms an even coating instead of soaking into the crust too rapidly.
- High heat, short time – Intense heat crisps the outside before the centre has time to dry out completely.
- Keep the foil in the drawer – Foil holds in steam, and steam is crunch’s sworn enemy.
- Cut it immediately before serving – Air helps maintain crispness; slices left piled together will sweat.
From side dish to understated main character
After using this two-stage method a few times, garlic bread is no longer an afterthought.
You will begin building sauces around it.
You will notice the sound of the crust as the knife passes through it, and the way the centre yields rather than tears.
Some people take things further by rubbing a raw garlic clove across the initial toasted layer before applying the butter, for a more intense hit.
Others add the smallest squeeze of lemon to the butter mixture for brightness.
The fundamental technique remains unchanged: a crisp shell first, followed by a rich centre.
One quietly impressive feature of the method is its forgiving nature.
Got day-old bread?
The initial toast revives it.
Is your oven slightly uneven?
The first toasting stage provides a visual prompt for making adjustments.
Once the exterior has set, you are much less likely to get scorched edges surrounding a pale, oily middle.
It may require an extra five minutes, but the textural difference feels like an entirely separate dish.
You may start wondering: what happens if I brush the bread with the lightest coating of olive oil after the first toast?
What if I replace half the butter with quality olive oil to make it lighter?
Or mix in roasted garlic for sweetness instead of raw garlic’s punch?
There is no one correct choice, which is part of the enjoyment.
We have all experienced that point where a basic snack becomes what everyone discusses long after the plates have been cleared.
Garlic bread, of all things, can become that dish.
Not due to a hidden ingredient, but because of one subtle shift in how you apply heat.
| Key point | Detail | Value for the reader |
|---|---|---|
| Two-step heat method | Toast the bread plain first, then add garlic butter and complete the baking | A consistently crisp crust with a soft, buttery centre every time |
| Bread and fat balance | Structured bread + softened butter with a touch of oil | Even flavour without greasy patches or soggy bottoms |
| Common mistakes to avoid | Wrapping in foil, low heat, adding too much butter at once | Avoids a limp texture and helps home cooks achieve “restaurant” results |
FAQ:
Question 1 Can I use ordinary sandwich bread for this method?
Yes, although the outcome will be softer. Choose sandwich bread that is slightly stale, toast it for a little longer initially and keep the second bake brief. It will still have more crunch than the usual one-stage butter-and-bake method.Question 2 Is fresh garlic invariably better than garlic powder?
Fresh garlic has a sharper, livelier flavour, particularly when stirred into soft butter. Garlic powder is useful in a pinch or when you want a gentler taste. Plenty of home cooks discreetly combine both for impact and consistency.Question 3 Which oven setting is best: conventional, fan or grill?
A conventional oven at high heat is the safest starting point. Use the fan setting if your oven tends to run cool or if you want quicker browning, but watch it closely. Switch to the grill only for the final 1–2 minutes if you want darker, bubbling edges.Question 4 Can I prepare garlic bread ahead of time for guests?
Yes. Complete the first toasting stage, allow the bread to cool and make the garlic butter separately. Just before serving, spread the butter over the pre-toasted bread and carry out the final bake. This preserves a crisp crust and soft centre, even when entertaining.Question 5 How can I prevent the garlic from burning on top?
Choose softened butter instead of pure oil, and do not leave large pieces of garlic exposed. Mince the garlic finely, blend it thoroughly into the butter and keep the second bake short. If your oven runs hot, position the shelf one level further down from the top.








Comments
No comments yet. Be the first to comment!
Leave a Comment