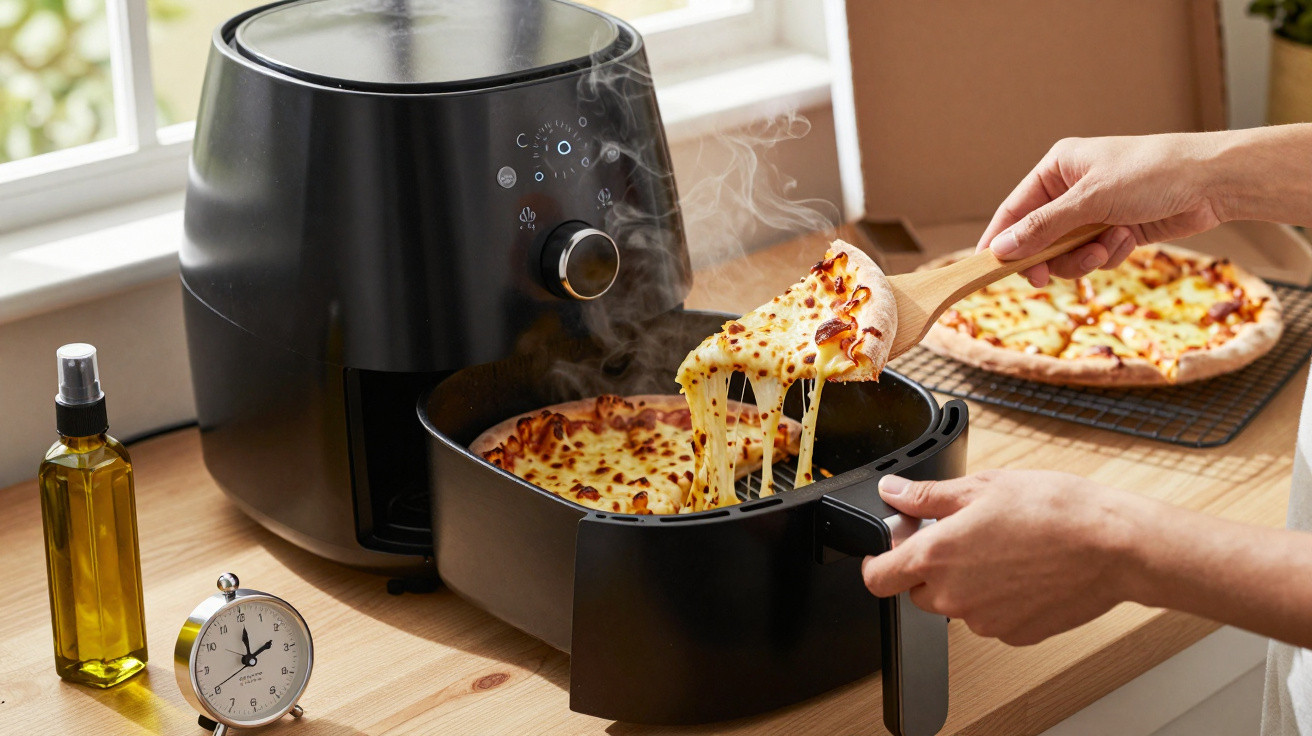
When baked in the oven, it often comes out soft in the middle and dry around the edges. In an air fryer, the same frozen pizza can emerge with a genuinely crisp base, provided you follow three settings the box never tells you about.
Why an air fryer beats the oven in this specific respect
The difference is not about power, but air circulation.
In a conventional oven, the pizza sits on a tray that takes several minutes to heat up. Meanwhile, the ice in the dough melts and evaporates slowly downwards, where the moisture remains trapped. The result is a lukewarm, soggy base while the topping is already cooking.
With an air fryer, hot air moves at high speed around the food, including beneath it thanks to the perforated basket. Moisture is carried away rather than allowed to build up. The surface of the crust dries quickly, which is precisely what creates crispness.
This is also why an air fryer excels with thin bases and is far less convincing for very thick, American-style bases, which require gentler heat over a longer period to cook through.
Air fryer frozen pizza settings that genuinely work
Ignore the instructions on the packaging, which are intended for a conventional oven. Use the following guidelines instead.
| Pizza type | Temperature | Time | Note |
|---|---|---|---|
| Thin base, 26 to 30 cm | 180 °C | 6 to 8 minutes | Best suited to an air fryer |
| Standard base | 180 °C | 8 to 10 minutes | Check the centre after 7 minutes |
| Thick or American-style base | 170 °C | 11 to 14 minutes | Lower temperature, longer cooking time |
| Mini pizzas or slices | 190 °C | 5 to 6 minutes | Watch from 4 minutes onwards |
| Already-cooked pizza to reheat | 160 °C | 3 to 4 minutes | No prior defrosting |
Three rules underpin these timings.
Always reduce the temperature by 20 to 30 °C compared with the packet instructions. Forced air transfers heat much more efficiently than a static oven, so a pizza set to 220 °C will blacken at the edges before the centre has warmed through.
Roughly halve the cooking time. A pizza stated to need 15 minutes in the oven will usually be ready in 7 to 8 minutes.
Preheat for three minutes. Putting the pizza into a cold appliance extends cooking time and gives moisture the opportunity to soften the base, cancelling out the method’s main advantage.
The diameter issue, and how to solve it
This is the main obstacle: a 30 cm pizza will not fit into a 22 cm basket.
There are three options, in order of effectiveness.
- Cut the pizza in half before cooking, while it is still frozen, using a large knife or a cleaver. Cook the halves one after the other, or side by side if the basket is large enough. This is the simplest approach and does not compromise the result.
- Cut it into four slices and cook them in one batch in dual-basket appliances. Cooking is even more uniform, as air can circulate around the sides.
- Slightly fold the edges upwards against the basket wall. It works, but produces an uneven, misshapen crust.
Cutting a frozen pizza is much easier than cutting a fresh one: the dough is firm and the cut is clean. Letting it defrost first is the worst possible option.
Mistakes that spoil the result
Defrosting the pizza before cooking. This is the most common and most damaging mistake. A defrosted pizza releases water into the dough, making it soft and sticky. It should always go in straight from the freezer.
Using baking paper from the beginning. Left under the pizza for the entire cooking cycle, it prevents air from circulating underneath and removes the very effect you are trying to achieve. If you are worried about cheese dripping, place the paper underneath only for the final two minutes, or pierce it several times.
Overfilling the basket. Two pizza halves stacked on top of each other will not cook properly. Air needs room to flow between the surfaces.
Not checking halfway through. Air fryers vary hugely from one model to another. A quick look at the 5-minute mark on your first attempt will help you establish the ideal setting for your appliance.
Leaving the pizza in the basket once cooking has stopped. Residual steam softens the base within a minute. Take it out immediately and place it on a wire rack, not a flat plate.
How to achieve a properly melted topping
A crisp base should not come at the expense of dry, rubbery cheese.
If the cheese remains pale while the base is already golden, add one minute at 200 °C at the end of cooking, raising the basket by one level if your model allows it. This final grilling effect browns the top without continuing to dry out the base.
Conversely, if the cheese browns too quickly, the starting temperature is too high: reduce it to 170 °C and add one or two minutes.
Adding fresh toppings noticeably improves the result: a few slices of mozzarella, ham, olives or cherry tomatoes added halfway through cooking. Avoid very wet ingredients at the start of the cycle, however, as they release water onto a base that is still delicate. Rocket, basil and olive oil should be added after cooking, never beforehand.
The energy and time comparison
This is usually the most persuasive argument.
A conventional oven needs 10 to 15 minutes of preheating, followed by 12 to 15 minutes of cooking, while using around 2,000 watts. That is roughly 25 minutes from start to finish.
An air fryer preheats in 3 minutes and cooks in 7 to 8 minutes, at a power generally between 1,200 and 1,700 watts, in a much smaller space. The meal is ready in around ten minutes with significantly lower electricity use.
For one pizza a week, the difference remains modest. For a household using its oven several times a week for small portions, it becomes genuinely noticeable on the electricity bill.
Five steps at a glance
- Preheat the air fryer for 3 minutes at 180 °C.
- Cut the still-frozen pizza into halves or quarters according to the basket size.
- Put it directly on the rack, without baking paper and without stacking pieces.
- Cook for 6 to 8 minutes for a thin base, checking halfway through.
- Remove it immediately and leave it on a wire rack for one minute before serving.
One final common-sense point: thin-base pizzas with simple toppings benefit most from this method. A pizza heavily loaded with vegetables or sauce will always remain wetter, whichever appliance you use.







Comments
No comments yet. Be the first to comment!
Leave a Comment