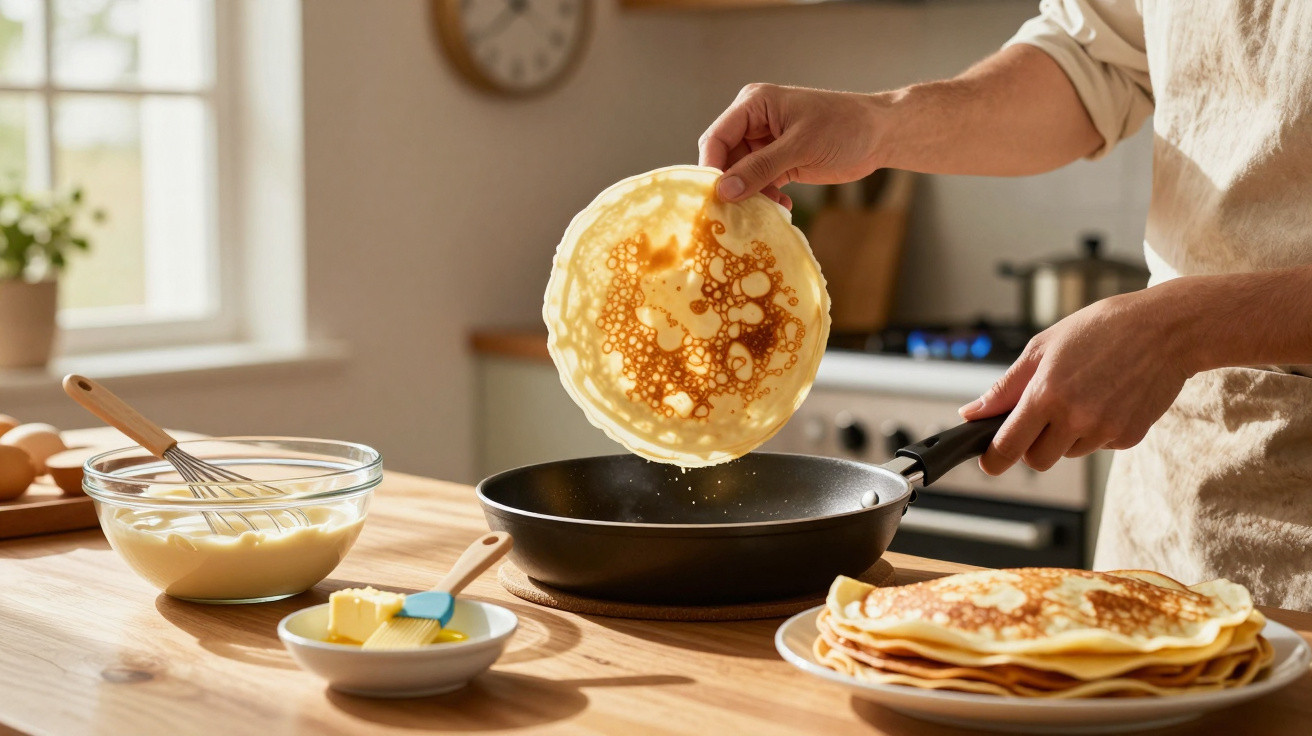
The first ladleful of batter is often the one that ruins the mood. You pour it with confidence, the pan seems hot, yet the crêpe will not slide free: it sticks in the middle, tears at the edge and ends up in pieces on the spatula. We all know that moment when we blame the recipe, the flour or even a frying pan handed down by a grandmother. In truth, crêpes that stick do not necessarily need more butter or a complicated batter. They nearly always point to an imbalance between three very practical factors: heat, fat and cooking time. Once you understand this simple mechanism, a thin crêpe lifts away with almost effortless ease. Turning it becomes enjoyable again.
The pan temperature makes all the difference before the first turn
A pan that is not hot enough absorbs the batter instead of setting it. The signs are a pale, damp crêpe that tears as soon as you try to slide a spatula underneath; it has not yet formed the thin crust that lets it release naturally. At the other extreme, an overheating pan browns the underside within seconds while the top remains runny and delicate. The right guide is neither smoke nor a hob turned up to full: it is a steady, assertive heat that feels almost calm.
In a family kitchen, one straightforward test prevents plenty of failures: drop a little water into the empty pan. If it sits still and evaporates slowly, the surface is still too cool; if it bursts and crackles fiercely, wait a little longer. When it skitters around in tiny beads before vanishing, the pan is ready. On a hob marked from 1 to 9, many crêpe pans work best at around 6 or 7 after two to three minutes of preheating.
Heat allows the egg proteins and flour starch to set quickly without drying out the crêpe. This cooked layer becomes firm enough to hold in the batter's moisture while still gliding over the fat in the pan. A good crêpe should not be forced: it tells you when it is ready. Once the edges start to dry and lift slightly, turning it is almost automatic. Often, all that is needed is another ten seconds beyond the point at which you think it is ready.
The right fat is not about how much butter you can see
The second factor is fat, and it often comes as a surprise: a pan flooded with butter can make crêpes stick just as much as a dry one. Too much butter creates uneven patches, burns in places and can leave the batter clinging to browned areas that are difficult to release. The most effective approach is to use very little fat, then spread it over the whole surface with kitchen paper. The pan should look satin-like, not shiny like a puddle.
Clarified butter, neutral oil or a thin coating of grapeseed oil work particularly well for repeated batches. With ordinary unsalted butter, the milk solids it contains can brown very quickly, especially as the crêpes keep coming and residue builds up in the pan. Let us be honest: nobody cleans a frying pan perfectly between twenty crêpes on a Sunday afternoon. Wiping it with lightly oiled kitchen paper every three or four crêpes is often enough to restore a clean, smooth surface.
A worn non-stick pan also needs this quiet care: never scrape it with a metal spatula, and avoid sudden temperature changes that can weaken its coating. A steel pan, meanwhile, can become excellent after a few uses, provided it is properly seasoned.
“A crêpe turns when it releases; if it resists, it is not a matter of force but of cooking.”
- A thin layer of fat before the first crêpe.
- Kitchen paper to remove any visible excess.
- A quick wipe of brown deposits between batches.
Rested batter and patient cooking prevent most sticking problems
The third factor comes into play before you even turn on the heat: the batter's texture. Batter that is too thick produces heavy crêpes that are difficult to spread and take longer to cook; batter that is too thin lacks structure when it is time to turn it. Aim for a consistency similar to pouring cream, lightly coating the ladle before spreading into a thin layer as soon as you tilt the pan. If the batter seems reluctant to flow, add a tablespoon of milk or water, mix it in, then assess the next crêpe.
Resting matters too, even when you arrive home late and the children are already asking for their first sugar crêpe. Thirty minutes gives the flour time to hydrate, lets small bubbles disappear and makes the batter more uniform; it spreads more easily, cooks more evenly and sticks less. An hour is convenient, but there is no need to turn this step into a ritual. Batter that has been thoroughly whisked, rested in the fridge and gently stirred before cooking already delivers a very noticeable difference.
Give the turning stage calm attention: wait until the top is no longer glossy, the edges are dry and the crêpe shifts when you gently shake the handle. Then slide a flexible spatula under one edge, lift it just enough to check the colour, and turn it with a confident movement. The boldest cooks may toss it, of course, but this is not a cooking exam. The real luxury is a thin crêpe that lifts without complaint and lands flat, ready for lemon, chocolate or simply a light scattering of sugar.
| Key point | Detail | Benefit for the reader |
|---|---|---|
| Steady heat | Preheat the pan over a medium-high heat before pouring in the batter. | The crêpe sets quickly and releases without tearing. |
| Light greasing | Use kitchen paper to spread a tiny amount of clarified butter or oil. | An even surface, with no burnt patches or excess fat. |
| Fluid, rested batter | Leave it to rest for at least 30 minutes, then adjust the consistency if necessary. | Thin crêpes that are easy to spread and turn. |





Comments
No comments yet. Be the first to comment!
Leave a Comment