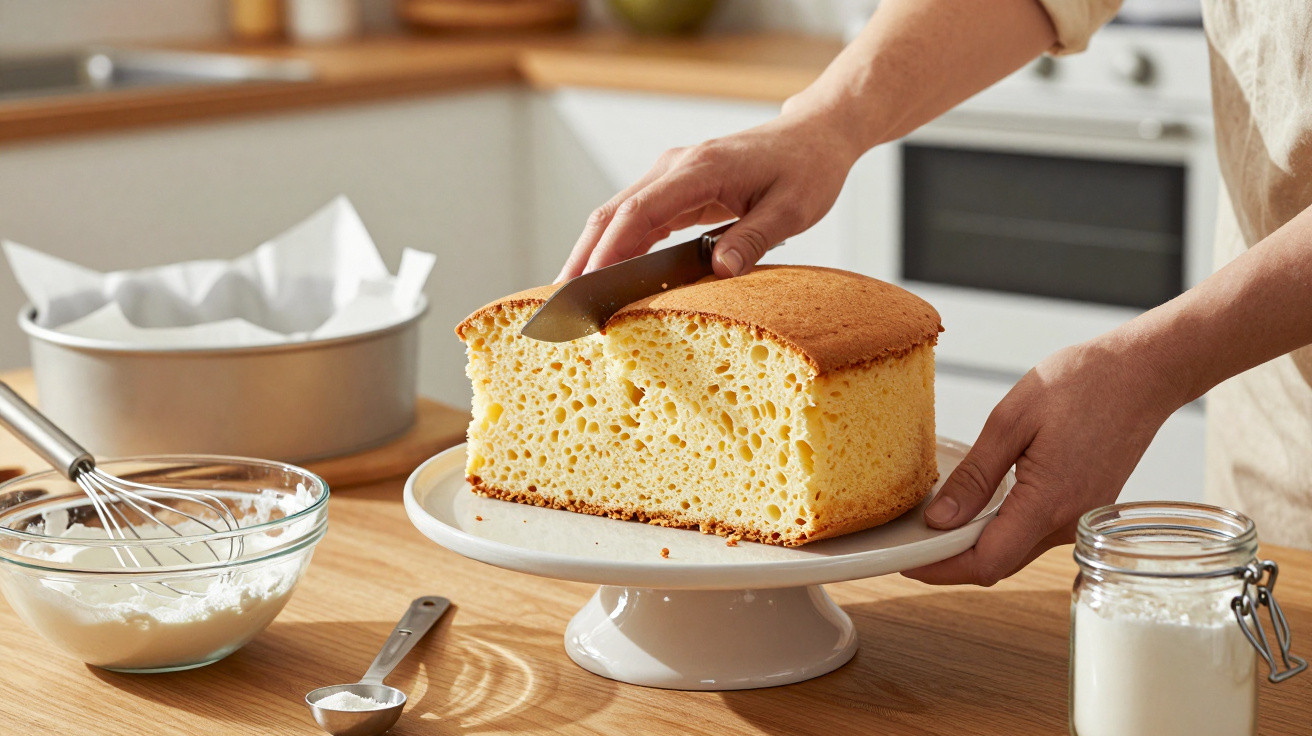
The unassuming gluten-free genoise - that light European sponge - is proof. The secret is to let the eggs provide the rise while carefully chosen starches create the structure. If you have ever cut into a crumbly gluten-free cake layer and felt that familiar disappointment, consider this your answer. Expect a soft crumb, a resilient bite and tidy slices that stay intact. No odd aftertaste. No hard-to-source mystery flour blends. Only a bowl, a whisk and a delicate touch. It is the sort of recipe you tape inside a kitchen cupboard: the one you rely on when guests are due. Ready for a genoise that truly seems to float?
My kitchen was barely awake when I broke the first egg into a glass bowl. Steam rose from a pan of gently simmering water as the sugar dropped in like snow. Whisk, whisk, whisk. As the mixture warmed, its sound shifted: sluggish at first, then energetic, then airy. When I raised the whisk, a ribbon landed on the surface, held its shape, then slowly disappeared. The batter appeared to breathe. I sifted in the flour and folded it through as gently as if tucking in a child, barely daring to exhale. The timer flashed. When I opened the oven, the cake had risen above the rim of its tin. The batter had simply… floated.
The quiet secret of gluten-free genoise
Genoise can feel intimidating precisely because it is so straightforward. There is nothing to conceal mistakes. Its height comes neither from baking powder nor gluten strands. Air, rather than gluten, creates the lift. The eggs do the hard work: warm them, whip them into a shiny foam, then handle that foam with an exceptionally light touch. Rather than trying to recreate wheat, the gluten-free approach pairs the egg structure with fine starches that do not drag it down. Once that balance is right, you get a tender crumb, a clean bite and slices that resemble clouds filled with tiny, orderly bubbles. It is strangely gratifying.
I once made two sponges for a friend’s birthday - one traditional and one gluten-free. Everyone served themselves, talked away and lost track of which was which. The gluten-free cake went first. The warmed, whipped eggs had expanded to four times their original volume, while the batter had the sheen of satin. I chose an even mix of white rice flour and potato starch, sifted it three times and incorporated it using a broad spatula. No gum and no complication. Vanilla simple syrup kept the cake soft and lush. Someone asked whether I had added almond flour; I had not. It was merely air, carefully supported by the right starches. That is the entire secret.
Here is the principle in simple terms. Wheat gluten catches gas in a network, whereas eggs hold it in foam. In place of that gluten network, use exceptionally fine, low-protein starches that will not disrupt the foam. Rice flour produces a delicate crumb, while potato or corn starch contributes lift and a crisp, clean finish. Sugar reinforces the foam, warmth relaxes the proteins so they whip to greater volume, and a small stream of melted butter brings flavour without flattening the mixture. You are creating a framework of bubbles and film, not stretchy strands. Keep it warm, stay gentle and the structure remains sound. That is all there is to it.
Gluten-free genoise recipe, method and practical tips
For one 20 cm round cake, tall enough to split, you will need: 4 large eggs (200 g without shells), 120 g sugar, 60 g fine white rice flour, 60 g potato starch (or 50 g cornflour plus 10 g potato starch), a pinch of salt, 1 tsp vanilla, 20 g unsalted butter, melted and cooled (optional), and simple syrup made from 100 g water plus 100 g sugar. Warm the eggs and sugar over a gentle bain-marie to approximately 40–43°C, whisking throughout. Move the mixture to a stand mixer and beat for 6–8 minutes, until pale, thick and tripled in volume. The ribbon should remain on the surface for 3 seconds. Sift the flours three times. Fold them in gradually, in three additions, using a broad spatula. Pour the butter down the side of the bowl, fold twice more, then bake at 170°C for 25–28 minutes.
We have all experienced a sponge collapsing and wondered where it went wrong. Most often, one of three issues is responsible: the batter was too cold, the folding was too forceful or the flour was too heavy. A warm foam is supple, so it stretches instead of bursting. Work with a metal spoon or wide spatula: cut through the centre, sweep along the bottom, rotate the bowl by a quarter turn and repeat. If possible, weigh the eggs and sugar to make the result more consistent. Honestly, no one does that every day. For important occasions, though, the scales repay the effort. If your kitchen is cold, warm the bowl first with hot water, then dry it thoroughly.
Some bakers use a small amount - 1/4 tsp - of xanthan gum as extra protection; with an equal rice flour and starch blend, I seldom find it necessary. Whip the mixture warmer than feels necessary, then fold more gently than you think possible. Let that be the rule. For a dairy-free version, leave out the butter and the cake remains just as appealing. Bake it on the middle shelf, and do not open the oven during the first 20 minutes. Once the layers have cooled, brush them with vanilla syrup to deepen the flavour and soften the crumbs. If you intend to build a cake with cream, refrigerate it overnight; it will cut more neatly and sit more securely beneath the knife.
“Treat the batter like it’s full of tiny balloons. Your job is not to pop them.” - a pastry chef who hated wasted foam
- A reliable blend: 60 g rice flour plus 60 g potato starch for one 20 cm cake.
- The ideal whip: the ribbon lasts for 3–5 seconds and the mixture is at body temperature.
- The folding action: cut, scoop, turn; stop as soon as the last streaks disappear.
- Flavour options: lemon zest in the syrup, coffee syrup for a tiramisu-style flavour, or orange blossom for a lighter spring cake.
Serve, share and personalise it
A genoise offers a blank canvas. Brush it with espresso syrup and layer it with mascarpone for a tiramisu-style cake. For a summery version, add strawberries, lightly whipped cream and a squeeze of lemon. Chocolate lovers can sift 20 g cocoa powder into the flour, removing 20 g of starch to preserve the balance. Alternatively, leave it plain, split it into two and let a quality jam take centre stage. A good cake starts conversations. Once the crumbs are on the plates, people share stories: a grandmother’s traditions, a cake they miss or a treat they had believed was unavailable to them. That is the understated magic of this recipe: a gluten-free genoise that does not draw attention to itself but opens up conversations around the table.
| Key point | Detail | Benefit for the reader |
|---|---|---|
| Warm-whipped eggs | Heat to 40–43°C for maximum foam stability | A taller rise without chemical raising agents |
| Gluten-free blend | 50% fine rice flour plus 50% potato starch/cornflour | A light crumb that cuts cleanly |
| Gentle folding | Cut, scoop, turn; stop at the first sign of an even mixture | Prevents deflation and dense areas |









Comments
No comments yet. Be the first to comment!
Leave a Comment