A simple kitchen trick can often save their lives.
In countless gardens, the same anxious question arises each spring: has frost finished off my hydrangeas? Yellow leaves, bare branches and dried-out tips can make the situation look hopeless. But anyone who reaches for the spade too quickly may miss a remarkably simple opportunity to revive the shrub while creating several young plants at the same time.
When a hydrangea looks “dead” but is still alive inside
Many amateur gardeners underestimate just how resilient hydrangeas can be. Even where the upper shoots look brown and brittle, the lower parts often still contain life.
- Leaves drop or turn yellowish
- Shoot tips become dry and dark
- The shrub produces only sparse new growth
None of these signs automatically means the plant is beyond saving. It is worth examining the base of the shoots closely. If green areas are still visible there, you can use cuttings to give the plant an effective fresh start.
The trick: a weakened shrub can provide healthy sections that will grow strongly again in better conditions.
Why a potato helps hydrangeas
Rather than buying expensive specialist products, some professional florists use something that most people already have at home: potatoes. It may initially sound like a gardening myth, but there is a very logical reason behind it.
A potato is made up largely of water and starch. This creates a type of natural water reservoir around the cutting. That is precisely what many cuttings lack during their first few weeks: steady, gentle moisture directly at the freshly cut end.
The potato acts as a moist protective layer around the base of the hydrangea stem, stopping the cutting from drying out.
The tuber also provides a small nutrient boost without overwhelming the young plant. It cannot replace good soil on its own, but it can considerably improve the start – rather like a soft cushion that receives the cutting instead of leaving it in hard, dry soil.
Step by step: propagating hydrangeas with a potato
Choosing the right time
Late spring through to summer is the ideal period for this technique. At this stage, the shoots are green, flexible and not yet in full flower. These soft, non-woody stems root far more easily.
Taking the ideal cutting
Selecting the right shoot is vital for a successful start:
- Cutting length: around 10 to 15 centimetres
- At least two nodes, or leaf joints, on the stem
- No flowers; foliage or fresh buds only
- The shoot should be healthy, green and free from blemishes
Using sharp, clean scissors or a knife, cut the stem immediately below a node. Carefully remove the lower leaves so that nothing later rots in the soil. One or two pairs of leaves can remain at the top; they may be cut in half to reduce water loss through evaporation.
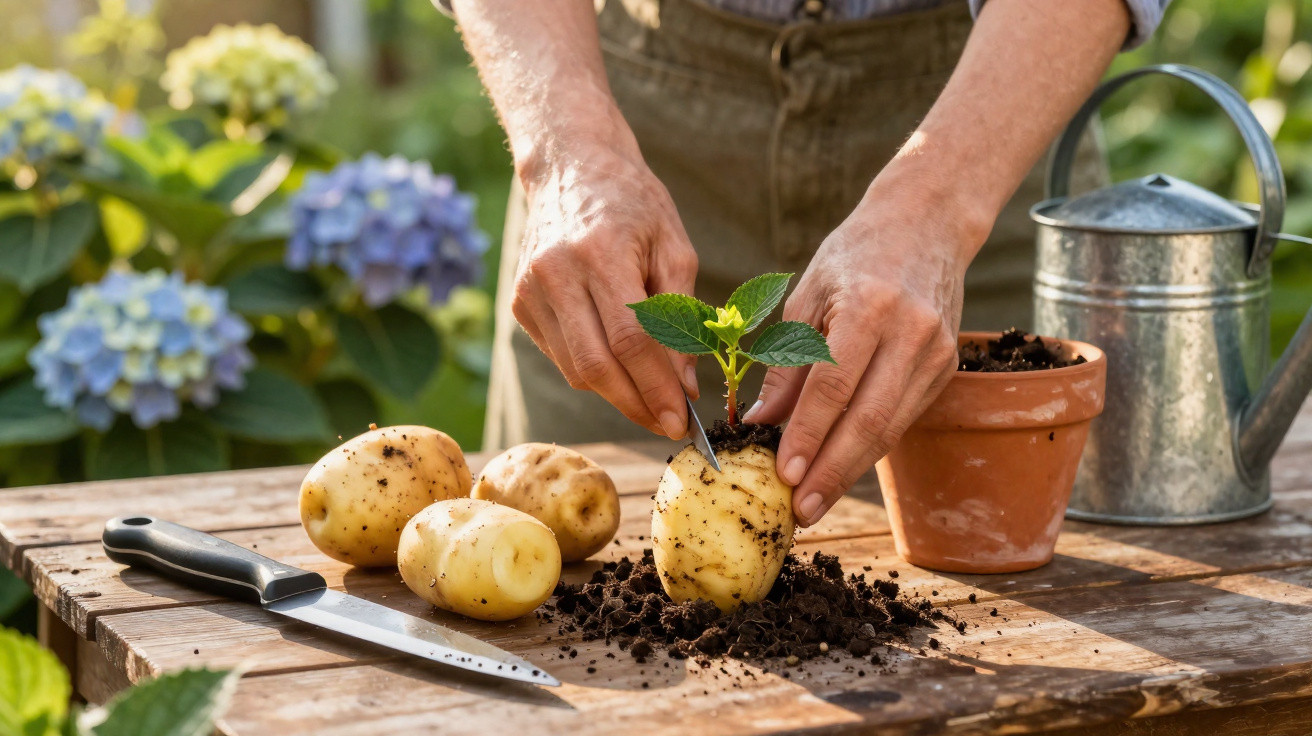
Placing the hydrangea cutting in the potato
Next comes the slightly unusual yet effective stage:
- Pick a firm, medium-sized potato with no rotten areas.
- Use a pencil or screwdriver to make a narrow hole roughly five centimetres deep.
- If desired, dip the lower part of the cutting into rooting powder; this can help, but is not essential.
- Carefully insert the stem into the hole so it fits tightly and does not wobble.
Important: the cutting must stand securely in the potato. A loose connection can quickly cause drying out or rot.
Plant the prepared hydrangea-and-potato combination in soil. Use a loose, well-draining growing medium, ideally a blend of garden soil and a little compost. Bury the tuber completely, leaving only the cutting above the surface.
Hydrangea care during the first weeks: neither too wet nor too dry
The next few days determine whether the new hydrangea cutting develops roots. Incorrect watering is the most common cause of failure. The soil should stay evenly and lightly moist, but never become wet and heavy.
- Position: bright, but out of direct midday sunshine
- Soil: loose and free-draining, with no waterlogging
- Watering: regularly in small amounts; never soak it completely
After around three to four weeks, carry out the first test. Hold the cutting gently and give it a slight pull. Clear resistance indicates that roots have formed. If the stem comes out easily, it needs more time – or, unfortunately, it has not survived.
From delicate cutting to robust garden hydrangea
Once the young hydrangea produces noticeable new leaves and remains firmly rooted in the soil, it has passed its most vulnerable stage. Even so, it is still sensitive at first. Wind, strong sunshine and heavy downpours can quickly affect it.
Young hydrangeas benefit from a sheltered position with bright shade and a consistent water supply.
Many gardeners allow their cuttings to grow in pots for several months initially. This makes it easier to manage moisture, light and nutrients. The plant is then moved to its final place in the border the following spring.
How to look after the young plant properly
For a strong start, young hydrangeas need:
- A pot with drainage holes, allowing excess water to run away
- Humus-rich, slightly acidic soil
- A position away from intense midday sun
- Gentle applications of fertiliser formulated for flowering shrubs or hydrangeas
If you are unsure whether the plant is ready to go outside, it is better to wait a little longer. A cool, sheltered spot near a window or on a partially shaded balcony is ideal during this transition.
What makes the potato method work
The principle of surrounding cuttings with a water-rich supporting material has a long history. Many plant enthusiasts use moss, coconut fibre or specialist propagation compost. A potato works in a similar way, but is much cheaper and more convenient because it is usually already in the kitchen.
This method is especially suitable for hydrangeas because they generally require plenty of moisture. The tuber acts as a moisture buffer: when the soil dries slightly, it releases water. If too much is applied, the surrounding soil can drain away the excess. This balance improves the likelihood of stable root development.
Interestingly, this trick is not limited to hydrangeas. Other ornamental shrubs and some herbs can also respond well, including certain roses, lavender and sage. The same rule always applies: use healthy parent plants only, so that diseases are not spread.
Risks, limits and useful additions
The potato method is not entirely risk-free. Overwatering can cause the tuber to rot, and this rot may then spread to the cutting. An airy growing medium and a location without standing moisture are therefore particularly important.
It makes sense to combine this method with conventional measures:
- Use clean, disinfected cutting tools
- Apply rooting hormones to the cut end if desired
- Provide light shade, for example with a pierced freezer bag used as a “mini greenhouse”
Anyone who succeeds once will often try this technique on other plants as well. Over time, this can create a small collection of home-grown shrubs without a marathon trip to the garden centre. And the hydrangea shrub that seemed lost can suddenly become the foundation for vigorous new flowering stars in the garden.










Comments
No comments yet. Be the first to comment!
Leave a Comment