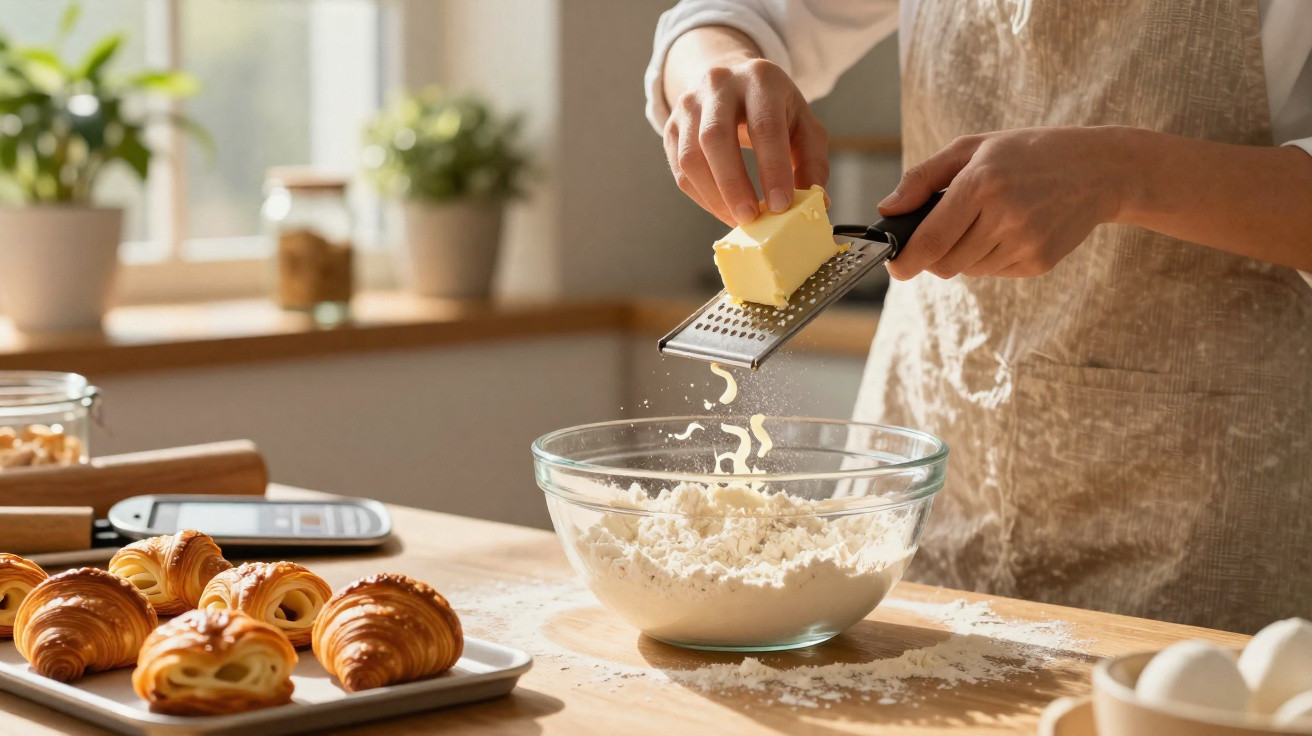
The kitchen was already overheating when the pastry dough began to resist. Butter streaked through the flour like hand cream, the rolling pin stuck to the worktop, and the layers merged into one forlorn beige slab. The recipe image had promised a tall stack of crisp, golden flakes; mine resembled a soggy pancake with ambition.
I tipped the lot into the bin, partly frustrated and partly intrigued. How were people on Instagram effortlessly making croissants on a Tuesday evening? What had they discovered that I had missed?
A few days later, a friend silently pushed a box grater and a solidly frozen block of butter across my worktop. “Freeze this first. Then try again.”
The next dough did more than cooperate.
It changed completely.
Why frozen, grated butter changes everything
The first time you take pastry from the oven made with frozen, grated butter, there is a brief moment of surprise. It rises; the edges blister and pull apart into clear layers. Its top resembles sheets of tissue paper, stacked together and browned at their tips.
You have not suddenly become a professional baker. You have simply assigned butter a different role.
Rather than blending into the flour like lotion, it remains as countless fine, chilled fragments. Every shred will become an air pocket later on: a tiny lift ready to raise the dough.
Imagine a Sunday morning when you are only half awake, still in the T-shirt you slept in, attempting to roll pie dough before the coffee has taken effect. The room is warm, your hands are warm and the butter has softened. Before long, the dough turns sticky, your patience becomes thinner than the pastry, and you are searching “why is my pastry tough” with flour-covered fingers.
Freezing and grating butter quietly resets that whole situation.
Because the butter remains cold for longer, you can work more quickly. The dough stays cooler, neater and easier to roll.
There is a straightforward reason this trick is so effective. Flaky pastry relies on contrast: chilled butter meeting the relatively high heat of the oven. Fine shards of frozen butter remain intact while you mix and roll, separate from the flour instead of disappearing into it.
Once the pastry goes into the oven, the water inside those pieces of butter becomes steam. The steam forces apart the layers of dough while the melting fat coats them.
The result is a stack of layers rather than a dense, bread-like crumb. You’re not just making dough; you’re building tiny, edible architecture.
How to freeze and grate butter for ultra-flaky pastry
The process is almost ridiculously easy. Begin with unsalted butter straight from the fridge, cutting it into blocks if necessary. Wrap it, then freeze it for at least 30–45 minutes, until it is firm throughout but not so hard that it is impossible to manage.
Use the coarse side of a box grater and grate the butter quickly into a shallow bowl. Gently toss the curls with a spoon to keep them separate, then return the bowl to the freezer while you measure the flour, salt and any sugar.
When it is time to mix, add the icy shreds to the dry ingredients and toss them as though dressing a salad. Each pale strand should remain cold, distinct and lightly coated with flour.
This is where much pastry disappointment begins: handling dough too much, for too long, with overly warm hands. It does not need to be kneaded like bread. You are encouraging it rather than fighting it. Gradually pour in cold water, turning the bowl as the flour and butter start to gather into a rough dough. A few dry patches do not matter; resting will allow them to hydrate.
If the butter starts softening or sticking together, stop and refrigerate the bowl for ten minutes. There is no need to panic or hurry.
Realistically, no one does this every day. Yet when you do, the reward is considerable.
“I spent ten years blaming my oven for my flat pastries,” laughs Clara, a self‑taught baker who now teaches weekend workshops. “Turned out it was my butter. Once I started freezing and grating it, people thought I’d changed recipes. I hadn’t. I’d only changed temperature and texture.”
To make the method stick, remember this simple checklist:
- Put the butter in the freezer before adding it to the dough.
- Grate only on the coarse side, working quickly.
- Chill everything again if the kitchen is warm.
- Treat the dough gently and stop as soon as it comes together.
- Refrigerate the dough before rolling, even when you are short of time.
The quiet confidence of knowing your pastry will flake
There is a modest, private satisfaction in putting a tray of pastries into the oven and genuinely trusting the outcome. No negotiating with the timer, checking every two minutes or applying a last-minute glaze to disguise mistakes. Instead, there is the calm certainty that the layers created with frozen, grated butter will do what they should.
You also begin to notice other benefits: dough that is cleaner to handle, a worktop that looks less like a battleground, and the aroma filling the kitchen as butter melts between fine layers of flour. One small, low-tech adjustment can make it feel as though the kitchen is finally working with you.
Some people bake to impress, while others do it to comfort themselves after a difficult day. Either way, the first crisp, shattering bite of truly flaky pastry feels different when you remember the disasters that preceded it. You can almost taste the failed pies and disappointing tarts that brought you to this technique.
We have all had that moment of looking at a dense crust and wondering whether “flaky” is simply a food-styling illusion.
Then you use frozen, grated butter once, and the myth turns into muscle memory.
You may begin with something modest: a rustic galette, straightforward cheese straws or a batch of rough-puff sausage rolls. These are the kinds of bakes that forgive uneven shapes while rewarding excellent texture. In time, the small butter ritual becomes part of your routine. A block goes into the freezer while you clear the table, and the grater finds a permanent place nearer the flour jar.
What started as a useful trick turns into a quiet piece of kitchen wisdom: not something you boast about, but something you pass on casually, just as somebody once passed it on to you.
One day, you will be the one sliding a grater across the worktop and saying, almost casually, “Freeze this first.”
| Key point | Detail | Value for the reader |
|---|---|---|
| Frozen butter stays in layers | Grated pieces remain firm while you mix and roll, forming pockets between sheets of dough | Produces greater rise, visible flakes and a lighter texture |
| Temperature buys you time | Chilled fat melts more slowly, allowing you to work without rushing or overheating the dough | Less stress and a lower risk of tough, greasy pastry |
| Simple gear, big result | Requires only a standard box grater and a home freezer; no specialist equipment or professional ability is required | Makes bakery-style pastry achievable for everyday home cooks |
FAQ:
- Question 1 Can I use salted butter instead of unsalted for grating and freezing? Yes, although you should reduce or leave out any additional salt in the recipe. Unsalted butter gives you greater control over seasoning.
- Question 2 How long can I keep grated butter in the freezer? Spread it in a thin layer inside a sealed container, where it will keep for up to a month. If it has clumped, break it apart before using.
- Question 3 Do I need to change the amount of butter when I grate it? No. The amount remains unchanged; only its shape and temperature differ, not its weight.
- Question 4 Will this method work for puff pastry and croissants? It is useful for “rough puff” pastry and quick laminated doughs. Traditional croissants still depend on laminating with block butter, though grated butter is an excellent practice method.
- Question 5 My grated butter melts while I work. What should I do? Put the bowl, and even the rolling pin, back into the fridge or freezer for 10–15 minutes. Cold pauses are part of the process, not a failure.









Comments
No comments yet. Be the first to comment!
Leave a Comment