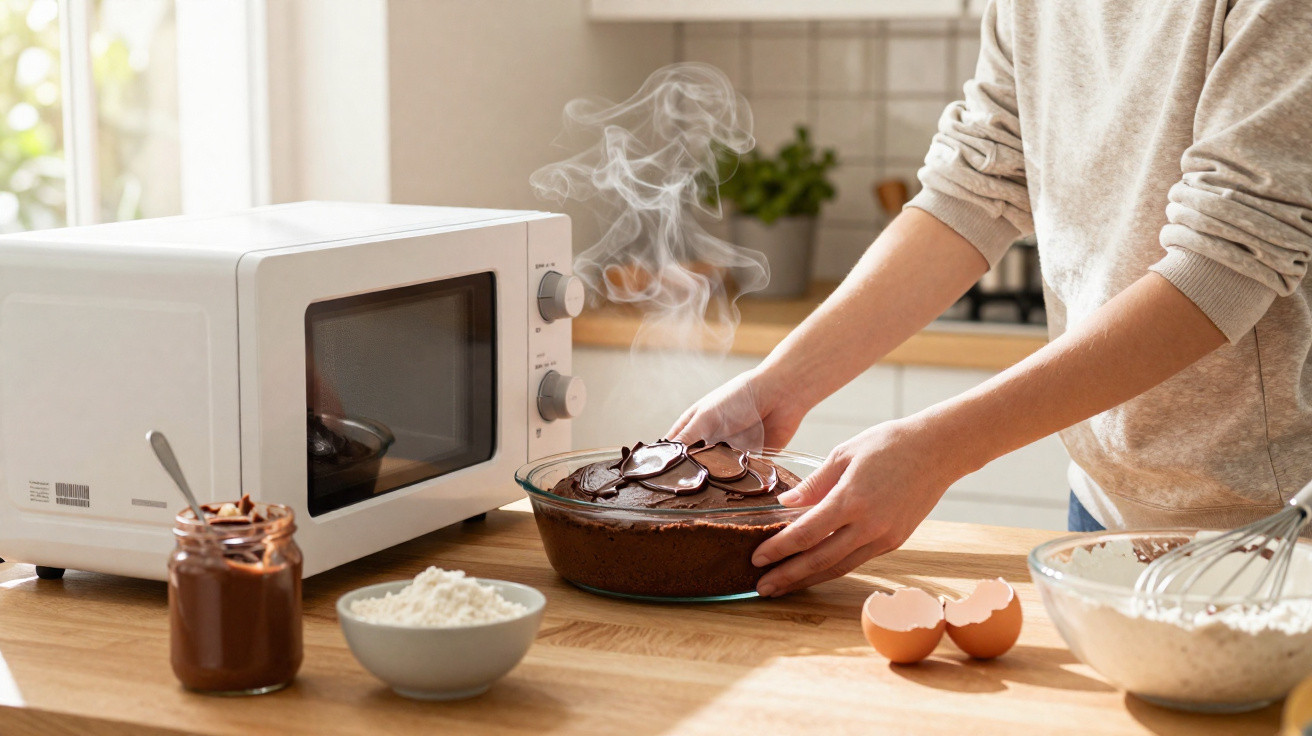
There are times when a chocolate craving arrives with full force just as time disappears.
You have only just sat down, the kettle is boiling, and guests, children or housemates are already asking, “Is there anything sweet?” Switching on the oven is not an option, while melting butter and cleaning five bowls sounds far too much like hard work. This is when an almost ridiculously easy chocolate cake comes into its own: three ingredients, a microwave and just ten minutes.
A genuine chocolate cake in 10 minutes
Recipes promising quick cakes are everywhere, but plenty of them still leave you standing in the kitchen for 30 minutes. This one really is speedy. It takes roughly five minutes to combine the batter, four to five minutes in the microwave and a short resting period. You can be slicing it while the plates are still warm from washing up.
This recipe turns a jar of chocolate-hazelnut spread into a soft, shareable cake in less time than it takes to preheat an oven.
Its success comes down to two useful shortcuts: chocolate-hazelnut spread already includes sugar and fat, and the microwave replaces the oven. The result retains the reassuring texture of a homemade chocolate cake, but without lengthy preparation or waiting around.
The three cupboard ingredients you need
For a small family-sized cake that makes six to eight generous servings, you need remarkably little:
- 240 g chocolate-hazelnut spread (such as Nutella or a similar brand)
- 2 medium eggs
- 60 g self-raising flour (or 60 g plain flour plus 1 level teaspoon baking powder)
Nothing else is required: no additional butter, sugar or milk. The spread supplies the fat, sweetness and cocoa taste, while the eggs hold the batter together and help it rise. Flour gives the cake enough structure to cut tidy slices rather than leaving you with a sunken brownie-like mess.
Equipment to prepare before starting
Since the batter is ready in moments, setting everything out on the worktop first will save valuable time.
- A microwave-safe cake tin – silicone is particularly suitable, although glass works too
- One large mixing bowl
- A whisk or a strong fork
- A rubber spatula for scraping the bowl
- A knife or skewer for testing whether the cake is cooked
A round tin measuring approximately 18–20 cm in diameter is a good choice. A broader dish produces a thinner cake that cooks slightly more quickly, whereas a deeper tin may require another 30 seconds.
Making the three-ingredient chocolate cake
Combining the spread and eggs
Put the 240 g of chocolate-hazelnut spread into the mixing bowl. If it is particularly firm, warm it in the microwave on medium power for 15–20 seconds. It should become glossy and easier to stir, rather than very hot.
Whisk in the two eggs individually, beating well after each one. Keep mixing until the batter is smooth and shiny, with no visible strands of egg. Scrape down the sides of the bowl as needed so the mixture stays consistent.
Incorporating the flour without making it heavy
Scatter the 60 g of self-raising flour over the mixture. If you have a small sieve, sift it in instead; this helps prevent lumps and supports a lighter crumb.
Use the spatula to fold it through carefully, bringing the batter from the base of the bowl up and over. Stop as soon as all traces of white flour have disappeared. Mixing too much can make the cake a little chewy rather than soft.
Microwave power and cooking time
Grease the tin lightly if necessary, then transfer the batter into it and level the surface with the spatula. Set the tin in the middle of the microwave turntable for the most even cooking.
Microwave on full power for 4–5 minutes (around 800–900 W). After four minutes, push the point of a knife or skewer into the centre:
- The cake is done if it emerges clean or carries a few moist crumbs.
- If raw batter is still clinging to it, cook in further 30-second bursts.
Short bursts at the end prevent the cake from drying out and keep the middle soft and fudgy.
The often-missed resting period
Once the microwave has finished, do not be tempted to slice the cake immediately. Let it rest for around 4–5 minutes at room temperature instead. This allows the heat to distribute through the middle more evenly and gives the cake time to set.
Afterwards, either carefully turn it onto a plate or serve it directly from the dish. The kitchen will smell as though you have made a proper chocolate bake, despite never using the oven.
Flavour variations while retaining the core three ingredients
A fast molten-centre option
For an impressive dessert that needs very little extra effort, create a melting chocolate middle. Spoon half the batter into the tin, add one or two squares of dark chocolate to the centre, then cover them with the remaining batter.
Cook as usual. Once sliced, the cake will reveal a richer pool of melted chocolate in the middle, perfect for an effortless last-minute “wow” moment at the table.
Little additions with a big flavour effect
A handful of small store-cupboard extras can lift the flavour without making the recipe more complicated:
- A pinch of sea salt to bring out the chocolate flavour
- A few drops of vanilla or almond extract
- Around ¼ teaspoon of instant coffee granules to intensify the cocoa notes
These additions take virtually no extra time, yet give the finished cake a more “bakery-style” flavour.
Gluten-free version
For gluten-free guests, replace the wheat flour with 60 g gluten-free self-raising flour, or use a gluten-free cake flour blend.
The process remains exactly the same. Check the texture particularly carefully towards the end of cooking, however, because certain gluten-free blends dry out a little sooner and may need a shorter final burst.
When your microwave has lower power
Older and smaller microwaves may only reach around 700 W or less. The cake will still work, but it will need more time at full power: generally 6–7 minutes.
Test the centre in the same way with a knife, adding further 30-second intervals where required. Cooking in stages keeps the crumb soft and reduces the risk of tough, rubbery edges.
Serving ideas for a proper dessert
This chocolate cake is particularly delicious served slightly warm on its own. A few simple accompaniments can turn it into a dinner-party-style dessert that happens to have taken only ten minutes.
- Serve it warm to keep the centre especially soft
- Add a scoop of vanilla ice cream for hot-and-cold contrast
- Give children a glass of cold milk alongside it
- Match it with a short, strong espresso for adults
- Finish with unsweetened cocoa or icing sugar just before serving
| Occasion | How to serve |
|---|---|
| Weeknight treat | Plain, warm and cut into thick squares |
| Unexpected guests | With ice cream and a dusting of cocoa |
| Children’s snack | Small slices served with cold milk |
| Coffee catch-up | Thin wedges alongside strong coffee |
Why the three-ingredient method works
This cake may seem like little more than a kitchen shortcut, but food science explains why it succeeds. Chocolate-hazelnut spread is already a balanced combination of fat, sugar and cocoa solids. Using it as the foundation means there is no need to measure butter, sugar and chocolate separately.
As the eggs are whisked, they capture air, helping the batter rise when heated. Self-raising flour contributes both starch and a raising agent. Together, these ingredients hold that air in place, creating a cake that keeps its shape without becoming dry.
The microwave simply provides speed. It heats water and fat molecules directly, allowing the centre to cook far faster than in a conventional oven. This is also why the resting period is important: it gives the residual heat time to complete the cooking more gently.
Points to consider if you make it regularly
If this recipe becomes your go-to emergency dessert, a few practical habits are useful. Keep a jar of spread and a small bag of self-raising flour in the cupboard and you will always be only two eggs away from cake. Measuring the ingredients once and writing them on a sticky label attached to the jar can also save you checking your phone halfway through baking.
There is a nutritional consideration too. Each slice is high in sugar and fat because the spread does most of the work. That does not mean it is forbidden, but it is better enjoyed as an occasional treat or divided into shared portions. Serving it with fruit or plain yoghurt can make the plate feel a little more balanced without losing its comforting chocolate appeal.










Comments
No comments yet. Be the first to comment!
Leave a Comment