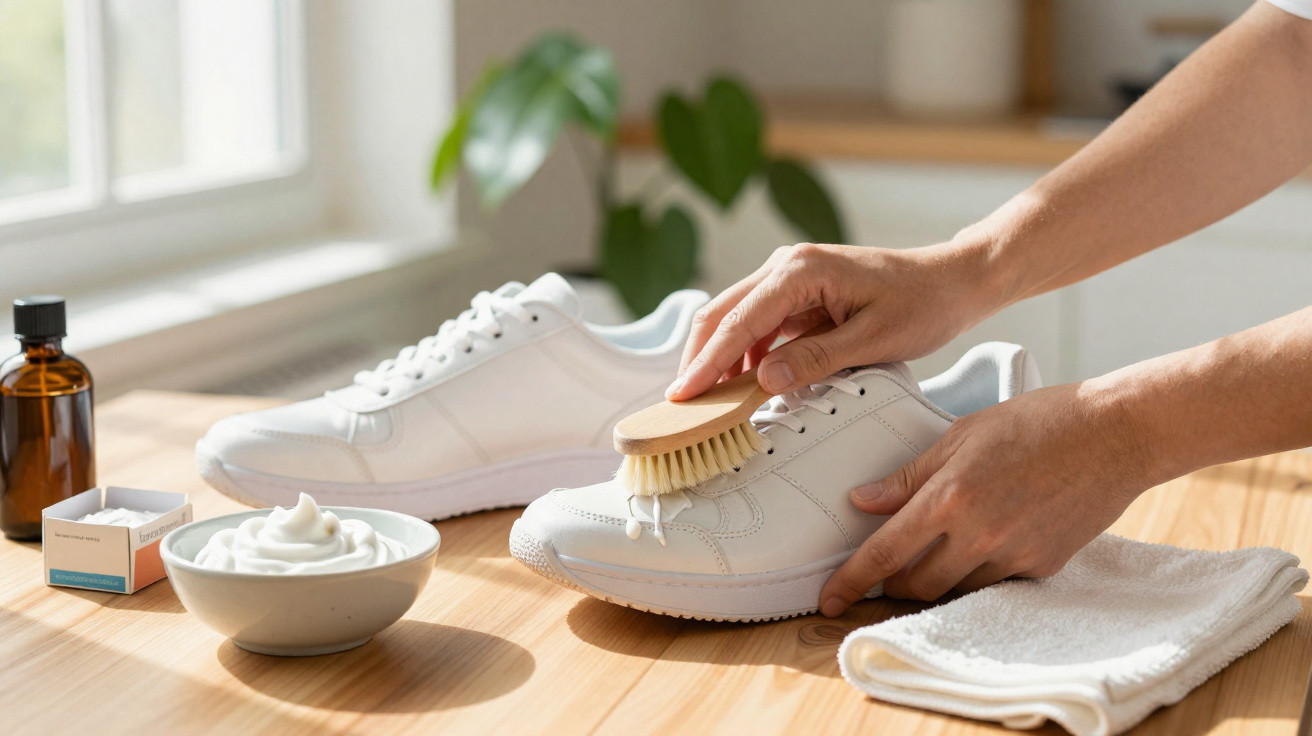
White trainers have long been more than just sports shoes. They work with a summer dress, an office outfit and make almost any look feel more relaxed. The downside is that, after a few weeks of city life, they tend to look grey rather than white. Many people then thoughtlessly put their trainers in the washing machine, only to find damaged stitching or yellow marks afterwards. Yet there is a far gentler, almost free way to brighten them again without ruining them.
Why the washing machine secretly damages white trainers
Heat, friction and moisture: the unseen trainer destroyers
A 30-degree delicate wash may sound harmless in theory. Inside the drum, however, plenty happens that trainers do not tolerate well. The shoes continually knock into one another and against the metal sides. This combination of friction, warmth and prolonged dampness attacks the materials.
The adhesives in the soles soften, lose their grip and may gradually come apart. Stitching is put under strain it was never designed to withstand. This affects the entire construction, particularly in trainers made from several layers.
“Anyone who repeatedly puts trainers through a full machine wash significantly shortens their lifespan – even if they look clean afterwards.”
The myth of ‘clean’: where dirt becomes even more embedded
There is another issue: water often pushes dirt further into the material instead of lifting it away. Once the shoes dry, familiar yellowish tide marks can appear, especially on the sole and where fabric meets rubber.
Detergent residue can also remain trapped in the fibres, particularly if the machine was overloaded. These deposits practically attract dust and grime from the street. As a result, the shoes quickly look marked again – sometimes even worse than before.
The natural pairing that beats chemical cleaners
Sodium bicarbonate: a gentle abrasive with a brightening effect
Rather than reaching for the washing machine, it is worth looking in the household-cleaning cupboard. The key ingredient in this trick is sodium bicarbonate, commonly known as baking soda or bicarbonate of soda. Its fine crystals act like an exceptionally mild scouring paste.
It releases ingrained dirt from small creases in leather or from fabric surfaces without harming the finish. Sodium bicarbonate also has a slight brightening effect and can reduce yellowing to some extent. It is ideal for white areas that have become dull and grey.
Black soap: cuts through grease while caring for the material
Its partner is soft black soap, a traditional cleaner made from vegetable oils. It breaks down grease, road dirt, sun cream residue, tar marks and green stains from grass in the park, while being less harsh on the material than aggressive chemicals.
It is especially useful for leather and high-quality synthetic materials for two reasons: it cleans while providing a little conditioning, so the shoe is less likely to feel dry or brittle afterwards.
“The combination of sodium bicarbonate and black soap cleans thoroughly without soaking the shoe – that is the crucial difference compared with the washing machine.”
The ‘paste’ for clean trainers: how to make the mixture
All you need for cleaning is a small bowl and two everyday ingredients:
- 2 tablespoons of sodium bicarbonate (pure powder, not baking powder)
- 1 tablespoon of soft black soap
Getting the consistency right: think toothpaste, not soup
Mix the two ingredients thoroughly until they form a thick, creamy paste. It should be roughly as firm as shaving cream or thick toothpaste. If the mixture is too runny and drips from the spoon, add a little more powder.
This thick consistency matters: the mixture should cling to the surface and work there, rather than run inside the shoe and soak everything. A slight fizz while stirring is normal and shows that the ingredients have started to react.
Why using less water works better here
Too much liquid is the biggest weakness of many cleaning attempts. If you use a large bowl and brush and completely soak the shoe, you may end up with foam, but also wrinkled leather, swollen fabric and fresh water marks.
The concentrated paste avoids that problem. It remains on the surface, loosens visible dirt exactly where it sits and keeps the inside of the shoe largely dry. This helps the shape stay intact and prevents glued sections from softening.
How to apply the mixture correctly
Start with problem areas: the sole and creases
An old toothbrush or a soft nail brush is enough for application. Pick up a small amount of paste and work it into the dirt using circular movements.
Take particular care with:
- the rubber sole, especially the edge around the shoe
- the usual creases above the toes
- slightly rough fabric sections where dust easily collects
The more time you spend on these areas, the clearer the white will look afterwards. Even slightly yellowed soles can often regain noticeably more freshness this way.
Leave it to work: why 15 minutes makes a difference
Once applied, leave the paste on the shoe for around a quarter of an hour. During this time, the black soap dissolves grease and stubborn residue, while the powder gently brightens the surface.
“Anyone who wipes the mixture away immediately loses a large part of the effect. The waiting time is the ‘turbo’ of the whole trick.”
Wipe and dry properly – or new marks can appear
Use a microfibre cloth instead of the tap
There is one clear rule for removing the paste: no full soak. Lightly dampen a soft microfibre cloth, wring it out thoroughly and carefully lift away the residue. Rinse and wring out the cloth repeatedly as you go, so that no grey slurry is left behind on the shoe.
A direct stream of water from the tap may rinse everything away quickly, but it also saturates the whole surface. That is precisely what can lead to unattractive yellow marks later.
Air-dry in the shade: no heat, no stress on the materials
After cleaning, leave the trainers to dry at room temperature in an airy, shaded spot. Radiators, hairdryers and direct sunlight are all off limits. Intense heat ages adhesive, makes leather brittle and encourages further discolouration.
A practical tip is to loosely fill the shoes with newspaper. The paper absorbs remaining moisture while also helping them retain their shape. Replacing it after one or two hours speeds up the process without putting the material under strain.
How to keep your trainers white for longer
Waterproofing spray as an invisible protective shield
Once the trainers are dry again, a short extra step is worthwhile: use a waterproofing spray for textile and/or leather. It creates a thin layer over the surface, making it harder for water and dirt to stick.
This not only reduces new stains, but also makes the next cleaning session considerably quicker. One application can provide several weeks of practical everyday protection, depending on the weather and how often the shoes are worn.
A mini routine after wearing prevents ingrained dirt
Checking your shoes briefly straight after wearing them can save you from major cleaning sessions later. Light scuffs on the sole can usually be removed immediately with a damp cloth or a so-called ‘magic eraser’ sponge.
- after city walks: quickly wipe the sole with a cloth
- after rain: allow them to dry, then brush away loose traces of soil
- for stains: treat the affected area with a small amount of paste rather than cleaning the entire shoe straight away
What to consider for different materials
Smooth leather, synthetic leather and fabric: not every surface responds the same way
Smooth leather generally tolerates the paste well, provided you do not scrub aggressively. After cleaning, applying a thin layer of clear leather conditioner can be useful for keeping the shoe supple.
With synthetic leather, only light pressure with the brush is usually needed. Rubbing too hard is more likely to cause abrasion here. Fabric trainers are more robust, but should still not be saturated. It is best to be especially cautious around seams and glued sections.
When it is better not to use this method
Delicate specialist materials such as suede, nubuck or very coarse mesh fabrics are more sensitive. Sodium bicarbonate may leave visible traces on them or alter their texture. For these shoes, specialist cleaners and suitable brushes are the better choice.
| Material | Suitable? | Note |
|---|---|---|
| Smooth leather | Yes | Brush gently; use leather cream afterwards if needed |
| Synthetic leather | Yes | Do not rub too hard; test on a small area |
| Textile / canvas | Yes | Do not soak; treat the surface only |
| Suede / nubuck | Rather not | Use specialist brushes and sprays |
Why the effort is genuinely worthwhile
Treating trainers in this way saves money in the long run. They remain wearable-looking for longer, need replacing less often and are less likely to end up in the bin so quickly. It also conserves resources, as every new pair of shoes involves production, transport and packaging.
There is a second practical benefit: clean, well-maintained shoes make every outfit look more polished. Especially at the office or for appointments, a fresh pair of trainers can often make more of an impression than a new jacket.
A thorough clean once a month, with quick touch-ups in between when needed, can keep white trainers looking remarkably ‘new’ for a long time. And it only takes two simple household products that many people already have in their cleaning cupboard.














Comments
No comments yet. Be the first to comment!
Leave a Comment